Trophy Mountains, Wells Grey Provincial Park British Columbia

Gearing up for Winter Photography

Gearing up for Winter Photography

Trophy Mountains, Wells Grey Provincial Park British Columbia Winter PhotographyTrophy Mountains British Columbia  #3962  Purchase

With fall photography wrapping up most of us are beginning to dream of plans for next year’s photography trips. But what about the next several months? There are plenty of photography opportunities and subjects during the winter months too. But I’m not talking about heading down to the Southwest for desert photography. I’m talking about the cold snowy areas of National, State, and Provincial Parks, many of which are nearly deserted in the winter months.

But before going into tips and techniques of actually photographing in winter let’s talk about how to stay safe and comfortable.

Winter photography is definitely more challenging than photographing in warm summer weather. However, with a little preparation and the proper gear, it can be safe, comfortable, and extremely rewarding. In this post, I’m going to outline some tips on gear, safety, and getting around in winter.

All the various items of winter clothing and gear are generally pretty pricey, but you need to get the best you can afford. The key here is to not skimp on quality. Some items that perform great in summer easily break or break down in cold temperatures. In particular, gas canister stoves are nearly useless in cold temperatures.

Bow Valley in winter, Banff National Park Winter PhotographyBow Valley Banff National Park #43869  Purchase

Winter Photography Clothing:

  • The rule in outdoor safety is cotton kills. Cotton has no insulation properties, leaving you vulnerable to hypothermia. And when cotton is wet it is nearly impossible to dry off in cold temperatures.
  • Merino Wool is your best option for base layers. Unlike traditional wool, Merino wool is softer and isn’t itchy. It’s warm, and comfortable, and stays fresher smelling than synthetics after a few days of wear.
  • Waterproof shell jacket and pants. Look for features such as built-in gaiters, suspenders, articulated knees, hood, and deep pockets with zippers.
  • Down jacket or parka. Absolutely nothing beats down for insulation. Keep it dry and it’ll be your best friend. But get it wet and it’s worse than cotton for insulation. I wear my down jacket when standing around camp or when waiting for the light. However, it’s too warm for heavy exertion, when you risk getting it wet from perspiration.
  • Insulated high-top snow boots. You’ll be trudging through deep snow and standing around a lot. Make sure they fit well. Tight-fitting footwear equals cold feet.
  • Two pairs of gloves or mittens. I have insulated ski gloves with leather palms and fingers and a thinner set of synthetic gloves for better dexterity when working.
  • Hat, sunglasses, and or ski goggles. In addition to the hood on your jacket, it’s wise to bring along a wool or fleece beanie. Also, a good full-face balaclava is essential when it gets really cold and windy. Goggles are great during windier conditions, they provide better visibility and help keep your face warm.
Ski Touring Manning Provincial Park British ColumbiaSki Touring Manning Provincial Park B.C.  #43980  Purchase

Getting Around:

Unless you plan on photographing from your vehicle or on well-packed trails, you’ll need an efficient way to get around in deep snow. How you do that will depend on your goals and location. If you’re photographing in the mountains you’re most likely going to encounter deep snow of varying consistency. Here in the Pacific Northwest, the snow is heavy, wet, and often over 10′ deep. In the Rockies, it tends to be very dry, powdery, and deep too. Regardless of which location it’s no fun post-holing through deep snow in just boots.

  • Snowshoes are a great method for beginners to travel through the snow in a great variety of conditions. They don’t require special skills or boots and are relatively inexpensive. However, don’t assume that you’ll be floating easily on top of the snow. Unless you’re on a packed trail you’ll be sinking in the snow to some degree, and working up a sweat. If you’re hiking through deep, wet, and heavy fresh snow they’re almost as exhausting as post-holing.
  • Backcountry, Alpine Touring (Randonee), Telemark skis, and Split-Board Snowboards. These are, in my experience and personal opinion, the best and most enjoyable ways to access photo subjects in deep mountain snow. You’ll get around easier and faster, and with much better flotation, even going uphill in steep terrain. Plus you’ll have a blast gliding back to your vehicle. The big downsides to these options are the gear can be expensive, and all of them have a much higher learning curve than snowshoes.
  • Cross-country skis are an option only if you’re on a groomed trail or have lots of experience. These skinny skis are generally too narrow for deep untracked snow and are nearly useless for going uphill. And they don’t turn very well on the downhill.
Backcountry skiers North Cascades WashingtonBackcountry Skiers North Cascades #56540  Purchase

Winter Photography Camera Gear Considerations:

In winter you must, of course, care for your camera gear to a greater degree. It’s quite a challenge to stay dry and keep snow off of your gear.

  • A good backpack-style case is essential If you’re going out for more than a few minutes. A good quality backcountry ski pack is a wise investment. Most traditional camera backpacks don’t have enough room for extra clothes, water, snacks, and other essential items necessary for winter travel.

For day trips I suggest finding a quality pack with around 2000-3000 cubic inches of storage. Dedicated ski packs have the advantage of being designed for winter backcountry travel, with room for essential safety equipment, such as shovels and avalanche probes. They are generally more waterproof and have features that can be accessed with gloved hands.

Another good idea is a camera case with a chest harness. This will give you quick access to your camera when snowshoeing or skiing. And it will keep you from constantly unloading your main pack in the snow whenever you come across a subject.

  • Batteries. Always bring extras and have them fully charged before heading out. Today lithium-ion is far superior and more reliable than standard AA batteries. But they are not immune to cold conditions, keep them warm in your jacket if you can.
      • Microfiber cloths and towels. The Hitchhikers Guide to the Universe states “A  towel is about the most massively useful thing an interstellar hitchhiker can have…” This is also true for winter photography. Despite your best efforts, you will constantly be wiping snow and moisture off your gear. Not to mention the constant fogging lens, filters, and camera bodies will get as you handle them. At least one microfiber cloth is essential, but take three for good measure.

Backcountry Safety warning sign Mount Baker Ski AreaBackcountry Safety Warning Mt. Baker Ski Area #56529  Purchase

Safety Considerations:

There are plenty of risks to consider when photographing in a winter environment.  Among them are traveling in avalanche terrain, hypothermia, frostbite, thin ice on lakes and streams, and getting your vehicle stuck. Nearly all of them can be avoided by careful planting, a good amount of caution, and common sense. Listed below are a few basic items you should never leave home without.

  • A Backcountry style snow shovel is a must. They’re strong, lightweight, and great for a variety of uses. Its main safety purpose is digging out an avalanche victim. But they are also useful for digging out your car after a storm and making a seat or shelter in the snow.
  • Avalanche transceivers and probes are essential if you’re planning on traveling into the backcountry through questionable terrain. However, these items are of absolutely no use if you are not trained in using them.  Always travel with companions and make sure everyone has avalanche rescue and awareness training!
  • Tire chains or other traction devices for your vehicle. Never leave home without these. Conditions can change rapidly throughout the day, and a bare dry road in the morning can have inches or feet of snow on them in the afternoon. Most mountain highways require them during the winter months anyway.
  • Jumper cables and or a portable jump starter are also a must. Imagine charging up camera batteries, a smartphone, and or a laptop while sitting in your car waiting for the snow to stop, only to find out your car battery is dead. Not a good feeling!
  • Gas camping stove and extra food. After a day in the snow and cold, it’s nice to have a hot drink. It can also be a lifesaver if you’re cold and on the verge of hypothermia. I always carry a large propane tank in my truck along with a two-burner camp stove. To keep it going in cold weather I need to replace the regulator on the stove every year or so. For the backcountry, I always carry a white gas MSR XGK. Unlike today’s popular gas canister stoves, this stove performs flawlessly in the coldest conditions.
  • Extra dry clothes and a sleeping bag. If you worked up a sweat, or all your clothes are wet you’ll appreciate changing into dry clothes back at the car. A sleeping bag is essential if a surprise storm prevents you from driving home.

North Cascades Highway closure Winter PhotographyNorth Cascades Highway in winter #56605  Purchase

Coming up next

For even more information on planning an outing, day trips vs. overnight backcountry trips, weather, and other considerations check out:
Essential Winter Photography Tips

If you enjoyed reading Gearing up for Winter Photography please share it with your friends and family.

Ever wonder what it’s like photographing landscapes and nature for a living? Check out my blog post:
What is it like to be a Professional Landscape Photographer?

All photos appearing in Gearing Up for Winter Photography are available for Commercial Licensing and Fine Art Prints. Click on any image to purchase, or contact me for more info!

Oxbow Bend Grand Teton National Park

Grand Teton Photography Locations

Grand Teton Photography Locations

Oxbow Bend Grand Teton National ParkOxbow Bend Grand Teton National Park #67724  Purchase

A photography trip to Grand Teton National Park can be a once-in-a-lifetime experience. It can also be one in a series of return trips to photograph the park in-depth, and in all seasons. Whichever it is for you, photographing this gem in the national park system can be a daunting challenge. This is especially true if it is your first visit to Grand Teton.

As I mentioned in my previous post, Grand Teton National Park Trip Planning, a visit to photograph this or any other national park can be a very rewarding experience. It can also be a disappointing exercise in frustration. Good planning and having enough time available to meet your photography goals increase your chances of success.

Since I’ve already outlined trip planning in my previous post, let’s start talking about locations. Grand Teton is a big park with dozens of great areas to photograph in. However, for this post, I’m going to focus only on some of the more popular front-country road accessed locations. But first.

Grand Teton in clearing stormGrand Teton in Clearing Storm #67405  Purchase

Some Essential Tips To Remember

 Essential Tip #1:   Nearly all photography locations in Grand Teton National Park are best photographed in early morning light and sunrise. Of course, this means you’ll need to accustom yourself to rising very early and setting up on location before dawn. However, most of those same locations are also great for evening and sunset photography. But in Grand Teton sunrise has the edge.

Essential Tip #2:   Scout out your desired locations ahead of time. Leisurely walk around and previsualize compositions in advance. That way when you return in the morning or evening you won’t waste precious time and light scrambling around wondering where the best compositions are.

Essential Tip #3:   Throughout this post, I reiterate the value of photographing during the morning and evening golden hours. However certain lighting conditions can make excellent photography possible during every part of the day. Just because the golden hour is over is no reason to stop photographing. Have an open mind and be creative!

Essential Tip #4:   Be ready to encounter hordes of other photographers nearly everywhere you go.  Plan to arrive and set up in your chosen spot an hour and a half to two hours early. Yes, that means for sunrise photography you’ll be there in position while the stars are still out. Dress warmly, you’ll be standing there for a while! And expect to be elbow to elbow and lock tripod legs with other photographers.

Essential Tip #5:   Be respectful of other photographers and park visitors. For many of them, this literally can be a once-in-a-lifetime trip that they scrimped and saved for. Everybody wants to get that perfect photo from the best spot. But don’t be one of those jerks that pushes and shoves their way into the front. If you arrive late that’s your fault, come back the next day, or better yet get creative and find a new composition nearby. And please be friendly. So many photographers can be reluctant to converse as if they’re going to reveal a special photo secret or technique by talking to their neighbor. Grow up, we’re all here for the same reason, have fun you may make some new friends.

Essential Tip #6:   PLEASE, PLEASE PLEASE, be respectful of the environment! All of our parks and wildlands are being loved and photographed to death. If there are signs prohibiting entry or are roped off for restoration, don’t ignore them, no matter how tempting it may be to get that photo. It also should go without saying, don’t alter the scene by cutting down branches that get in your way. If necessary retouch unwanted objects out in Photoshop. Read more about Outdoor Ethics here.

Essential Tip #7:   Wildlife such as bison, moose, and elk are abundant in Grand Teton National Park. All wildlife from bison and elk to squirrels and birds have difficult lives just trying to survive on a daily basis. Please give them a wide berth and strictly observe park regulations. Never ever, under any circumstances, for any reason, approach wildlife. They can easily be stressed and provoked into attacking. While you’re recuperating in the hospital, park officials will be busy destroying that animal. I’m sure that’s not in your trip plan.

Moulton Barn Grand Teton National ParkT.A. Moulton Barn Grand Teton National Park #67410  Purchase

Mormon Row Barns / Antelope Flats

This is is one of the closest locations to the town of Jackson and offers a variety of photographic opportunities. Historic Mormon Row has several noteworthy structures, but the two iconic Moulton Barns are the biggest attractions here. Both barns are close enough that you can photograph both of them during the same golden hour session. However, if you have time available try for one and return the next day for the other. That way you can avoid rushing and finding another parking in the limited parking areas. This area also has some attractive old cottonwood trees to aid in compositions, which are especially nice in fall color.

Antelope Flats Wildflowers Grand Teton National Park Wyoming
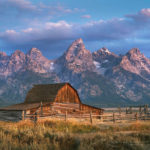
Antelope Flats Wildflowers Grand Teton National Park #52085 

Antelope Flats is a great area to photograph carpets of yellow balsamroot wildflowers in spring. They make a wonderful foreground element to the dramatic snow-covered Teton Range. Some of the best displays are in the vicinity of the Gros Ventre (pronounced “Grow Vaunt”) road. Early June is the best time of the year to photograph balsamroot and lupines in the Teton Valley. Again, you’ll want to thoroughly check out the entire area the day before to find where the best displays are.

Best time of day for photography:  Morning, though excellent in the evening.
Best season for photography: Moron Row spring, summer, fall. Antelope Flats wildflowers, late May-June.

Snake River Overlook Grant Teton National ParkSnake River Overlook #67652  Purchase

Overlooks Along U.S. Highway 191/89

These include Blacktail Ponds Overlook, Glacier View Turnout, Teton Point Turnout, and Snake River Overlook. All, except perhaps Blacktail Ponds Overlook, have excellent wide-open views of the Teton Range. Photography at these locations doesn’t get much easier, as compositions can be made a few steps from the parking lot. As you move from Blacktail Ponds Overlook in the south to Snake River Overlook in the North the view of the Teton Range changes considerably.

Snake River overlook is the most popular since it was here that Ansel Adams made his famous 1942 photo of the Tetons. Be forewarned that over the years trees in the scene have grown considerably. Today, because of this, the Snake River is partially obscured. The view is still wonderful though.

Best time of day for photography:  Morning, though excellent in the evening.
Best season for photography: All Seasons

Schwabacher Landing, Grand Teton National ParkSchwabacher’s Landing Grand Teton National Park #67503  Purchase

Schwabacher’s Landing

This is one of the prime locations in the Grand Teton for photography, and one of the few accessible to the Snake River. Expects to see lots of other photographers here at sunrise.

There are several excellent options here, including the iconic view of the Grand Teton framed by trees reflected in the still waters of beaver ponds. This photo is a short walk north from the parking lot at the end of the road. It’s imperative to arrive very early, as the ideal composition is within a narrow range of only about four feet wide. Be polite, your neighbor will be photographing the same scene only inches away from you.

Schwabacher Landing Grand Teton National ParkSchwabacher’s Landing Grand Teton National Park #67383  Purchase

There is also two creekside (actually branches of the Snake River) areas that provide great photo opportunities. The first is along the trail to the beaver pond viewpoint. The second,  just as interesting but less photographed, is 1/4 mile back down the road. Both of them offer compositions where the Teton Range is reflected in the calm waters. There is also an abundance of cottonwoods trees here, making fall photography an absolute must.

Schwabacher’s Landing is a location that offers so many possibilities that you can easily just photograph just here if you only have a couple of days available in the park.

Essential Tip #8:   Be aware that this entire area is in a fragile wetland environment. Please observe signs of areas closed for restoration. This is also prime moose habitat. Be alert when walking through brush, I once came across a female and her calf here. If you’ve never seen a moose in person you’ll be amazed at how big they are. Don’t get in their way!

Best time of day for photography:  Morning, and evening. Beaver ponds photo, mostly morning.
Best seasons for photography:  FallSpring, Summer. This area is closed and off-limits in winter to protect wildlife habitat.

Full Moon Grand Teton National ParkTeton Range from Cunningham Ranch #67608  Purchase

Cunningham Ranch

This is one of my favorite areas in the park for photography. It has excellent photographic potential but many photographers pass it over for Schwabacher’s Landing or Oxbow Bend. The views of the Teton Range here are outstanding. The western pole fencing makes a great composition element. It’s also possible to access views along the Snake River, via a long walk through pastures. Occasionally you’ll see herds of elk, or horses from the nearby Triangle X Ranch grazing here, another great aid for compositions.

Horses Grazing at Cunningham Ranch Grand Teton National ParkThe Teton Range from Cunningham Ranch #49377  Purchase

Nearby on the East side of Highway 191/89 is the North access to the Shadow Mountain Dispersed Camping Area of the Bridger-Teton National Forest. A wide parking lot just outside the park boundary is the only place in the entire valley available for winter camping.

Best time of day for photography:  Morning, and evening.
Best season for photography:  All year

Oxbow Bend sunrise Grand Teton National ParkOxbow Bend Sunrise Grand Teton National Park #67699  Purchase

Oxbow Bend

This is arguably the granddaddy of all photo locations in Grand Teton National Park. The views of Mount Moran and the Teton Range reflected in the still waters of the Snake River are recognizable throughout the world. In addition, this is a prime wildlife viewing area. You can often see Trumpeter Swans floating lazily on the water, along with moose grazing in the willows across the river. I once saw an enormous herd of elk fording the river here, a scene reminiscent of Serengeti migrations.

Oxbow Bend sunset Grand Teton National ParkOxbow Bend Sunset #67566  Purchase

You can also observe mobs of photographers, every morning and evening, every day. Don’t even think of finding a prime spot unless you get here well over an hour in advance of golden hour. Most photographers try for a spot at the parking lot edge, however, there are plenty of excellent options among the willows along the river.

Aside from the view from the river, there are also a couple of other spots well worth checking out. This is one of the best areas in the park for fall photography, mainly due to the abundance of aspens groves and willows. About a quarter-mile east of the Oxbow Bend parking lot is another pullout at the edge of large groves of aspens. During the height of fall color, these trees make spectacular frames for the Teton Range.

Grand Teton National Park WyomingTeton Range above Oxbow Bend #52069  Purchase

Also, on the benchland above Oxbow Bend, there are great views looking down to the aspens surrounding the area, and out to the Teton Range. This view is accessed from the trails on the Christian Pond Loop. If you have the time it’s well worth returning to photograph these two areas after photographing the main attraction. And of course, they’re another option if the riverside crowds are a bit too much for you.

Best time of day for photography:  Morning, and evening.
Best season for photography:  Hands down, fall is best, but excellent throughout the year. Also one of the best locations in the park for winter photography.

Wildflowers Grand Teton National Park WyomingWildflowers Grand Teton National Park #52034  Purchase

Pilgrim Creek Road

Between Jackson Lake Junction and Colter Bay Village is Pilgrim Creek Road. This approximately three-mile-long gravel road gives access to the Teton Wilderness in the Bridger-Teton National Forest. For photographers, the first mile or so of this road gives access to some of the best spring wildflowers in the North end of the park.

Unlike wildflowers around Antelope Flats, this area can be a bit more tricky to photograph. The peak bloom usually happens around early June, but a good show depends on a wet season. During a drier than normal spring, there may not be a large enough bloom to make the trip worthwhile. Also, some of the best groupings may not be obvious from the road, so make sure to park your vehicle and thoroughly scout the area on foot.

Best time of day for photography:  Morning, and evening.
Best season for photography:  Spring

Grand Teton National Park in winterWinter along Teton Park Road #3725  Purchase

Teton Park Road

This long stretch of road encompasses everything from Moose Entrance in the South to the Jackson Lake Junction in the North. Beginning in the North the Potholes and Mount Moran Turnouts offer closer photos of the Teton Range, and in particular the Cathedral Group. In June this is also a very good area for yellow balsamroot wildflowers.

The main highlights of this area are the trails along Leigh, String, and Jenny Lakes. You can park at the Leigh and String Lakes Trailhead and do the entire loop hike. Or you can park at the Jenny Lake Overlook and walk only a portion of the trail. Either way, this is the best place to get up close and personal photos of the Cathedral Group and Cascade Canyon.

Further south the Taggart Lake trail will take you to stunningly close views of the Grand Teton.

Essential Tip #9:   Leigh, String, and Jenny Lakes are best photographed at sunrise and early morning. The lake waters are more apt to be still and mirror-like at this time. Also, the proximity here to the walls of the Teton Range will put most of the areas along Teton Park Road in shade during the second part of the day.

Best time of day for photography:  Morning
Best seasons for photography:  Spring, Summer, Fall. Teton Park Road is closed in winter at Taggart Lake Trailhead in the South and Signal Mountain Lodge in the North. However, in winter this road is open to cross country skiing and snowshoeing.

Grand Teton National ParkThe Teton Range from Jackson Lake #67525  Purchase

Other Grand Teton Photography Locations

As mentioned earlier, this post covers only the more popular easily accessible locations for photography in Grand Teton National Park. There are many more opportunities to explore including these:

  • Laurence S. Rockefeller Preserve
  • Viewpoints along the North section of Jackson Lake
  • Extensive trail system along Jackson Lake starting from Colter Bay Village
  • In the backcountry, a network of trails gives access to the backside of the Teton Range and includes numerous lakes, canyons, and subalpine meadows. All overnight backcountry trips require permits.

Camera Equipment Suggestions

What camera gear should you bring on a Grand Teton photography trip? In a nutshell, everything you have. Ok, maybe not everything, especially if you’re a gear junkie with dozens of lenses and camera bodies. But the subject matter in the park is so diverse you’ll probably end up using everything from ultra-wide to telephoto lenses.

Basic Essentials:

  • Tripod
  • Wide to ultra-wide lenses
  • Normal range lens
  • Telephoto lens; for landscapes up to 200mm should be fine, but much longer focal lengths if you also plan to photograph wildlife.
  • Polarizing filter
  • Graduated Neutral Density Filters;  I still prefer to use these in the field over creating the effect in post-processing. Although in some situations they are not always the best option.
  • Remote shutter release

In Conclusion

Combining all the information and tips in this post and Grand Teton Photography Trip Planning, you now should have everything you need to know to have a productive, safe, and enjoyable trip to Grand Teton National Park. Now get out there and have fun!

Essential Tip #10:   BE CREATIVE! Use your own eyes and mind. Just because 20 other photographers are photographing the exact same scene, in the exact same position, with the exact same gear and settings, doesn’t mean that you have to follow suit. Photographing something uniquely and creatively could be as simple as just turning around to see what’s behind you!

Thanks for reading, feel free to share this post with your friends and colleagues!

Oxbow Bend sunrise Grand Teton National ParkOxbow Bend Sunrise Grand Teton National Park #67681  Purchase

Ever wonder what it’s like photographing landscapes and nature for a living? Check out my blog post:
What is it like to be a Professional Landscape Photographer?

All photos appearing in Grand Teton Photography Locations are available for Commercial Licensing and Fine Art Prints. Click on any image to purchase, or contact me for more info!

Want to learn more? Take your Creative Photography to the next level with  Private Instruction and Guided Photo Tours.

Related Blog Posts to Grand Teton Photography Locations:
Grand Teton Photography Trip Planning

Moulton Barn Grand Teton National Park

Grand Teton Photography Trip Planning

Grand Teton Photography Trip Planning

Moulton Barn Grand Teton National Park Grand Teton Photography Trip PlanningMoulton Barn Grand Teton National Park  #67219  Purchase

This post is the first in an ongoing series of articles intended to help landscape and nature photographers plan photography trips to big locations on a small budget.

Photography in Grand Teton, or any National Park, can be a very rewarding experience. It can also be a disappointing exercise in frustration. Even the most meticulous planning is not a guarantee of success. It all depends on what your goals are, and how much time you have available.

In this post, I’ll be offering some planning tips and suggestions which can help increase your chances of success during a Grand Teton photography trip. Whether the results are better vacation photos or portfolio-quality images, they’ll also help you obtain a more enjoyable and memorable experience.

Planning A Grand Teton Photography Trip

Theoretically, you can spend as little as a day in the park and come away with a few good photos. In reality that probably won’t happen. So I would recommend at least three days to concentrate on one, or maybe two locations. A better time frame would be a week. For a comprehensive trip to include all of the park’s highlights, at least two to three weeks would be ideal.

Make sure you have as much time available to meet your goals. And make those goals realistic, don’t expect to create portfolio-grade images every morning and evening during your stay. It’s incredibly unlikely that you will have excellent light to work with during every golden hour photo session. On my last trip, I spent two weeks in the park and had only one evening and two mornings of decent light.

Of course, it’s also a silly notion to think that planning on just one trip to Grand Teton you’ll come away with award-winning images from every corner of the park. Just like you can’t go to the grocery store and expect to buy all the food you’ll ever need if your lifetime. You’ll need to return again and again.

Learn to go with the flow, relax, get to know, and interact with your subject matter. If you only come away with one or two good photos that’s great, you can always return another time. Good photography is about much more than grabbing trophy images, it’s a lifetime learning journey that should be savored, not rushed.

Guided Tour Or Solo

Once you determine how much time you’ll have available the next thing you’ll need to decide is whether to go with an established workshop/photo tour or do the trip on your own. There are many advantages and disadvantages to either option.

Photo Tour/Workshop Advantages:
-Led by a seasoned professional photographer with intimate knowledge of the park and the opportunity of learning new techniques from a pro.
-Meals, lodging, and transportation usually included
-Being part of a group dynamic

Photo Tour/Workshop Disadvantages:
-Limited freedom to photograph where and when you want
-Daily schedules can be very rigid
-Travel times and distances from lodging to locations can be great
-Cost can be prohibitive

Solo Photo Tour Advantages:
-Unlimited freedom, photograph where you want when you want
-Ability to lodge or camp where you choose, cutting down on travel time to         locations
-Huge cost savings

Solo Photo Tour Disadvantages:
-Extra research needed to find the best locations
-Finding lodging on the fly daily can be difficult
-Lack of assistance from a leader or group members
-No one to share ideas or experiences with

During my entire career as a professional photographer, I’ve traveled mostly solo. I love the freedom and flexibility associated with this mode of travel. And I know for certain that I’ve been able to get better photos because of it. So this is the mode I’ll be giving tips on in this post.

Grand Teton Photography Trip Planning: Seasons

Many photographers consider autumn to be the best. However,  Grand Teton National Park offers spectacular photographic opportunities in all four seasons.

Grand Teton National Park in winter Grand Teton Photography Trip PlanningThe Teton Range in Winter #4660  Purchase

Winter:  Planning a winter photography trip to Grand Teton requires more preparation and gear. In winter Teton Park Road is closed to vehicles, as is the popular Schwabacher’s Landing. Antelope Flats and Mormon Row Roads are also inaccessible. However, all the viewpoints along Highway 191/89 from Jackson to the Flagg Ranch in the north are open, including the famous Oxbow Bend overlooks. Snowshoes and cross-country skis are an excellent option to access some of the easier areas of the park.

Most of the lodging and services in the park are also closed for the season. Lodging options are mostly in the Jackson area in winter, and camping is nearly nonexistent with just a few spots open in the Shadow Mountain area. With temperatures that can dip down to -30º you won’t have much company. But with the right weather and lighting, you’ll come back with some rare winter images of the park.

Spring:  Since the Teton Valley sits at an altitude of just over 6000′ winter conditions can last well into spring. May would be about the earliest I would consider visiting for spring photography. Late May through June is the best time to visit to see wildflowers. During this time many areas of the valley are blanked with brilliant yellow balsamroot and blue lupines, to name a few.

Antelope Flats and Gros Ventre (pronounced “Grow Vaunt”) roads, along with Pilgrim Creek Road near Colter Bay are among the best areas for spring wildflowers. Most of these areas are also wide open for including the snowy Teton Range as a dramatic backdrop for compositions.

Wildflowers Grand Teton National Park Wyoming Grand Teton Photography Trip PlanningWildflowers Grand Teton National Park #52086  Purchase

Summer: This is the high season for tourism in the park, and possibly one of the most challenging for photographers. This is not only because of having to deal with crowds but also because of weather conditions.

During the height of summer, high-pressure ridges can create beautiful warm sunny weather, which unfortunately keeps the sky free of clouds. Most photographers consider blank blue skies and gray rainy days as some of the worst conditions to work with. With global warming in full swing, these conditions can last well into September.

Along with those warm sunny days comes the yearly threat of wildfires. In recent years the park’s blue skies are often hazy with thick blankets of smoke. Another consideration of summer photography is that as the season progresses the Teton Range gradually loses its white cloak of snow. I don’t think I’m alone in feeling that snowy mountains look more attractive than bare rock.

Fall:  This is arguably the most popular season for photographers in Grand Teton National Park. Although the crowds of tourists and vacationers are mostly absent, there are now throngs of photographers to take their place. And for good reason. In a good year, the changing colors of aspens, cottonwoods, and willows can be as outstanding as autumn in New England.

In addition to the lively colors of foliage, the changing seasons bring back storms that not only clear the air but also dust the range with a fresh coat of snow. Quite possibly some of the most sought-after national park images in the country are those of the Teton Range in full autumn color after a snow storm.

Grand Teton National Park Wyoming Grand Teton Photography Trip PlanningSunset over the Teton Range #3966  Purchase

Grand Teton Photography Trip Planning: Lodging

Location, location, location. It’s all about location. And Grand Teton is no exception, it’s a big park with many great locations spread throughout it. Generally, you’ll have time to photograph only one location during the morning or evening golden hour. By the time you can reach the next spot the light will most likely have faded. And remember this isn’t a race or contest, slow down and appreciate where you are!

The closer you stay to your subject matter the better chance you have of being in right place at the right time. And you will be more relaxed and focused when you get there.

Absolutely nothing is worse than planning on being at a certain spot before sunrise than being late because of hitting the snooze alarm one last time and then having a long drive ahead. Stopped for speeding, or worse, hitting a moose in the dark during your haste? Ughh!

No matter where you stay, be it in a national park or forest service campground, or a motel or resort, be prepared to make reservations well in advance of your trip, if possible. Even in the shoulder seasons vacancies in lodging and campgrounds can be difficult to find. Popular campgrounds will fill by early morning. Research and plan ahead. It’s no fun driving around in the dark after a long day trying to find a place to sleep.

In the Town of Jackson:  If you crave luxury and have deep pockets then look no further than the town of Jackson. Some of the most opulent hotels and resorts in the West are in this town, as are many chain and mom and pop motels. However, be aware that all of them will have a considerably higher price due to their location.

Also, keep in mind that distances from the town of Jackson to many of the most scenic park locations can be anywhere from 15-35 miles. Not a terribly long drive, but back and forth to a motel over several days can really add up. And don’t forget that ideally, you’ll need to be at your desired location before sunrise and until after sunset. So you won’t be sleeping in that expensive bed for very long.

Shadow Mountain Dispersed Camping Area  Bridger Teton National ForestShadow Mountain Dispersed Camping Area #67195  Purchase

In Grand Teton National Park:  There are seven lodging options within the park boundaries. These range from rustic cabins and ranches all the way up to the full-service luxury hotel of the Jackson Lake Lodge. Depending on where in the park you want to orient your photography efforts, these facilities can put you just a few minutes from some of the most dramatic vistas in the park.

There are five official front country campgrounds in the park with varying amenities. At the time of this writing, none of them are available for advance reservations. Most of them will fill to capacity before 10:00 a.m. Jenny Lake is one of the best and most sought-after campgrounds. If you choose Jenny Lake campground be prepared to line up for a site well before sunrise, it routinely fills by 6:00 a.m.!

Bridger-Teton National Forest: There are several national forest campgrounds outside the eastern boundaries of the park. These include a couple on Gros Ventre Road and U.S. Highway 26-287.

In my opinion, the most ideal national forest campsites are in the Shadow Mountain camping areas of Bridger-Teton National Forest. This area is in an ideal location just outside of the eastern middle edge of the park. These sites are always my first choice when visiting the park. I know of at least one site here which has an incredible elevated view of the entire Teton Range and valley.

Camping in the Shadow Mountain area is free on a first-come-first-served basis. Stays are limited to five consecutive nights. However, it is primitive camping with only vault toilets and no running water. In addition, parts of the roads can be very difficult to negotiate, high clearance is advised and some can be impassable to trailers. As with everywhere else in the park vicinity, these sites fill up early.

Grand Teton National Park WyomingHighway 191 Grand Teton National Park #49386  Purchase

Fees, Passes, Provisions, Cell Signals

The entrance fee to Grand Teton National Park is currently $35 for a private vehicle and is good for seven days. An annual pass exclusive to Grand Teton National Park is $70. Note that both of these passes are good only for Grand Teton, they do not carry over to neighboring Yellowstone National Park.

Consider an America The Beautiful annual pass if you photograph in many national parks and federal recreations areas throughout the year. This pass costs $80 and is good for National Parks, BLM lands, National Forests, and more.

Various amenities like gas, groceries, showers and laundry services are available in several areas of the park. However, if you are on a budget plan to make a trip to Jackson to stock up on supplies. Park concessioners charge a premium for their goods. Although sometimes the cost of driving back to Jackson is more than an inflated price for goods in the park.

Grand Teton is one of the few national parks where you can get a decent cell signal in most areas. In the vicinity of visitor’s centers and lodges, you should be able to receive a signal strong enough to surf the web and transfer small files. Further out it will probably be only one or two bars strong.

In the next post, Grand Teton Photography Locations we’ll go into detail about how and when to photograph specific locations in the park.

Thanks for reading, feel free to share this post with your friends and colleagues!

Oxbow Bend sunrise Grand Teton National ParkOxbow Bend Sunrise Grand Teton National Park #67686  Purchase

Ever wonder what it’s like photographing landscapes and nature for a living? Check out my blog post:
What is it like to be a Professional Landscape Photographer?

All photos appearing in Grand Teton Photography Trip Planning are available for Commercial Licensing and Fine Art Prints. Click on any image to purchase, or contact me for more info!

Want to learn more? Take your Creative Photography to the next level with  Private Instruction and Guided Photo Tours.

Planning a Grand Teton Photography Trip