Nooksack Ridge in winter North Caascades Washington

Essential Winter Photography Tips

Essential Winter Photography Tips

Nooksack Ridge in winter North Cascades Washington Winter Photography Essential Tips
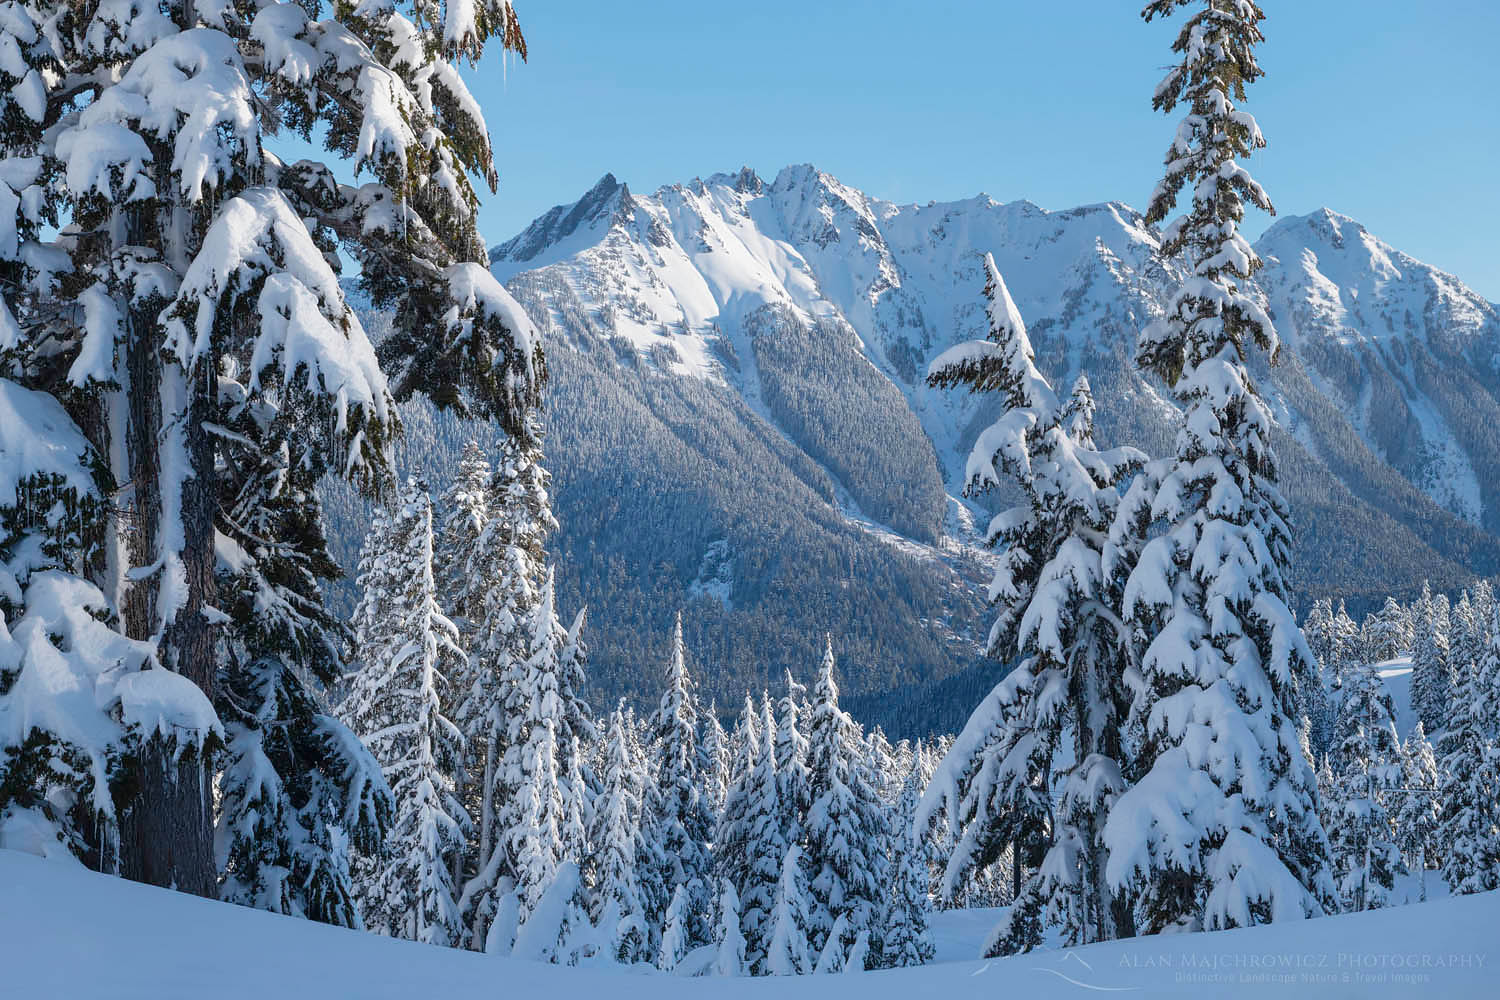
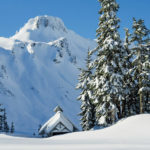
Heather Meadows North Cascades #64748  Purchase

Note: This post is a bit longer than some of my others since there are a lot of winter photography tips to share on the topic.

A successful winter photography trip is all about planning and timing, especially if you’re photographing landscapes. As I outlined in my previous post, winter photography presents some unique challenges to the photographer, but if you can get past them a whole new world rich with rewards will be open to you. Few experiences can match getting out of your tent at dawn after a storm has cleared to photograph a trackless pristine winter scene in perfect light!

Winter Photography Tips, Front Country or Backcountry:

When planning a winter photography trip your location options are the same as the rest of the year, front-country or backcountry. However, in winter a backcountry photography location involves more risk and preparation.

Icefields Parkway in Jasper National Park Winter Photography Essential TipsIcefields Parkway in Jasper National Park #43396  Purchase

Frontcountry locations can be accessed in several different ways. It may be as easy as driving up to a classic viewpoint along a road or in a national or state park. But keep in mind many of those locations may be closed or on unplowed roads in winter.

Utilizing ski area chairlifts is a great method for accessing winter landscapes. They can get you higher up to views usually accessible by hiking trails in summer. They’re also a good way to shave off some miles and elevation when starting a backcountry trip. Some ski areas offer a discounted one-trip-only lift ticket. But if you’re a skier a full-day ticket is the way to go. It will enable you to do some early morning photography, have fun skiing all day, then make one last trip up for evening light. Getting on and off a chair lift can be tricky though when you have a pack full of camera gear.

North Cascades winter backcountry camp Winter Photography Essential TipsNorth Cascades Winter Backcountry Camp  #47098  Purchase

Backcountry locations involve more planning, more gear to carry, and efficient means of travel. Don’t even consider getting into a winter backcountry location by just walking in snow boots. Nothing is more exhausting than trudging through hip-deep snow! Snowshoes, skis, or split-board snowboards are the best options.

All the gear for a full-day backcountry photography trip can be reasonably carried in a mid-size backpack. If you’re planning an overnight trip expect to carry at least 25% more weight on your back. But if that seems doable don’t forget that snowshoes or skis can add up to an additional 5-7 pounds on each foot Any way you look at it you’re in for a good workout!

A well-timed overnight backcountry trip will put you in an enviable position. Photographing a pristine landscape at sunrise just after a fresh snowfall is a magical experience, making it well worth all the effort!

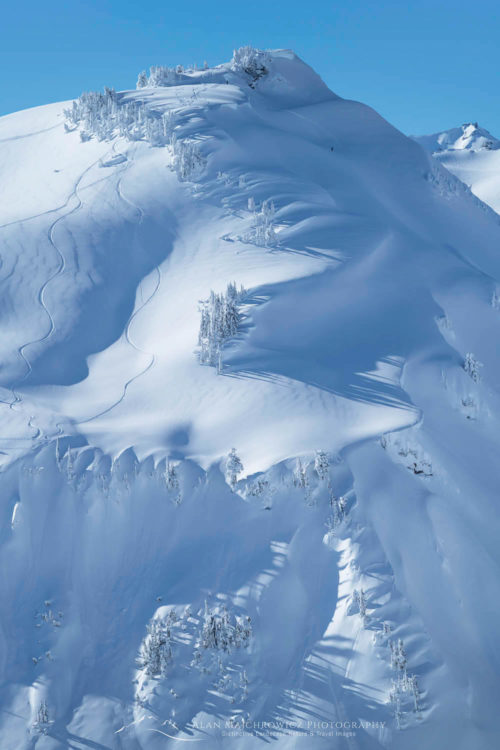
*Essential Tip: To photograph pristine landscapes arrive as early as possible when photographing near ski areas, or other popular locations. After a fresh snowfall skiers will flock to the slopes in hordes. Often within an hour after sunrise slopes will be completely tracked out. The popularity of backcountry skiing has exploded over the years. So even relatively remote areas can be tracked out quickly.

Also, be aware of reckless drivers on roads leading to ski areas. Many skiers throw caution to the wind when it comes to getting first lines.

Wells Grey Provincial Park in winter Winter Photography Trip PlanningWells Grey Provincial Park British Columbia #3683  Purchase

Light:

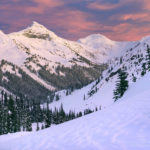
In winter the sun of course is in a lower latitude. And for photographers that means more opportunities for the golden light and side lighting. Also, since the days are shorter there’s a lot less waiting around in the cold for good light. The golden hour lasts longer in the morning and starts earlier in the afternoon. But even in the late morning and early afternoon, the angle of the sun can still present wonderful photographic opportunities.

As a bonus, you don’t need to get up as early in the morning. But if you’re camping out you’re in for nearly fourteen hours of darkness. You’ll also have less travel time available, requiring some locations to be an overnight trip. Of course, waiting until late winter or early spring means longer days and warmer temperatures. However, during the transitions of seasons, the weather will also be more volatile, which could also provide opportunities for dramatic light.

*Essential Tip: Set your camera meter on manual. Camera meters are set for a base exposure of neutral gray. All that white snow will trick your camera into exposing the scene too dark. There are numerous methods of compensating for this, but for me, the easiest is to set the camera on manual and overexpose +1 stop. Also, always check your exposure on your camera’s histogram view, and adjust your exposure accordingly.

Weather:

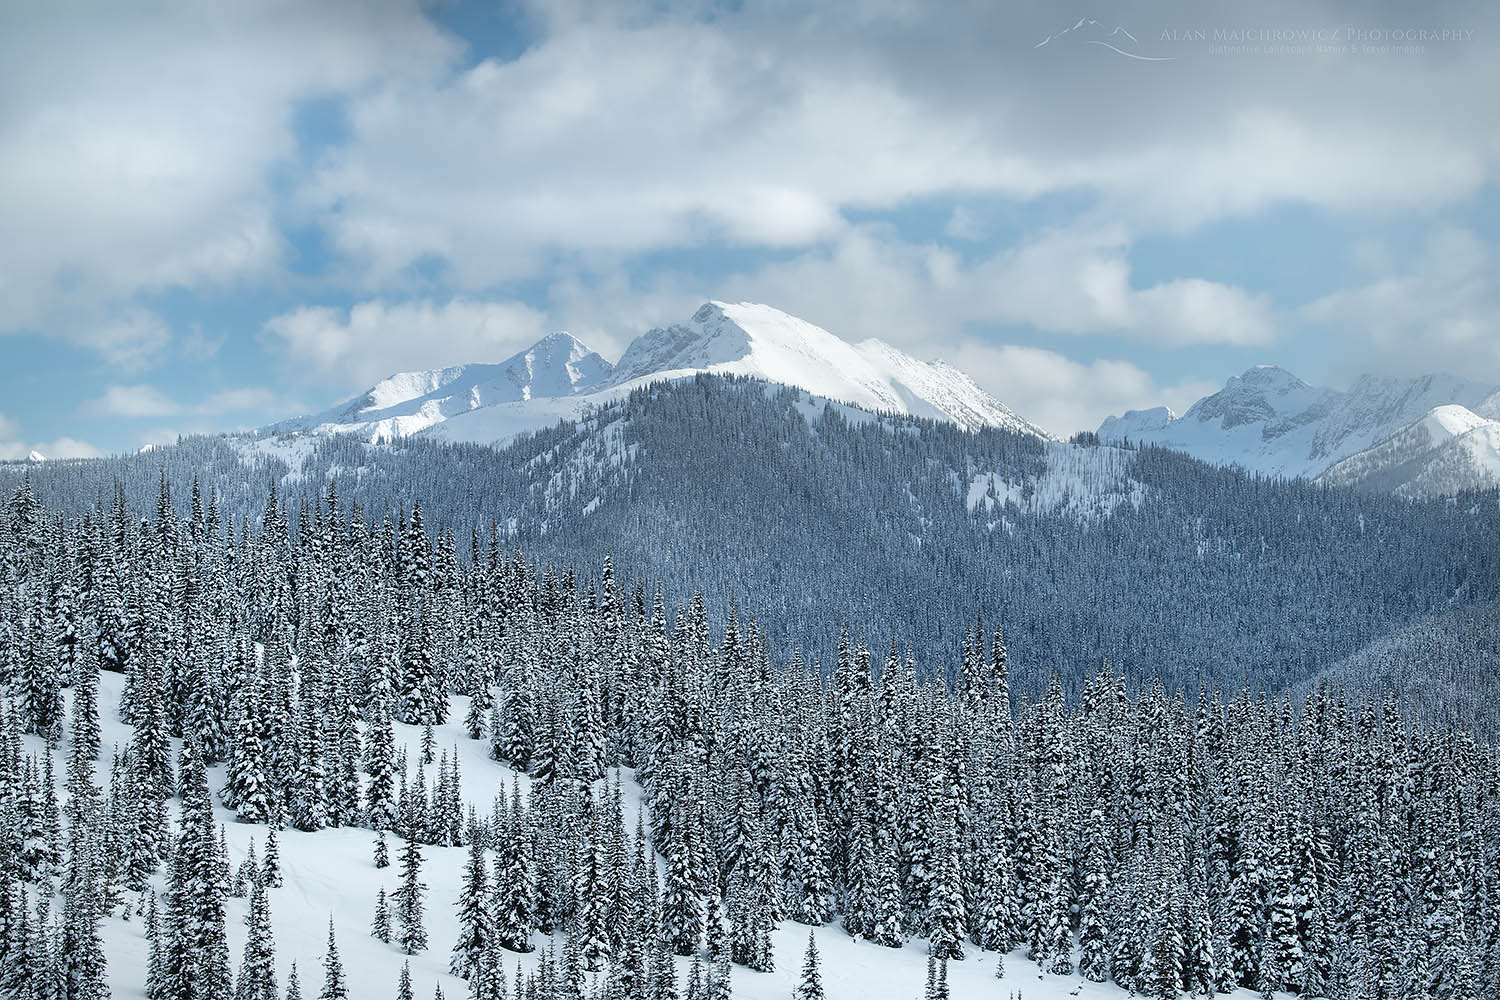
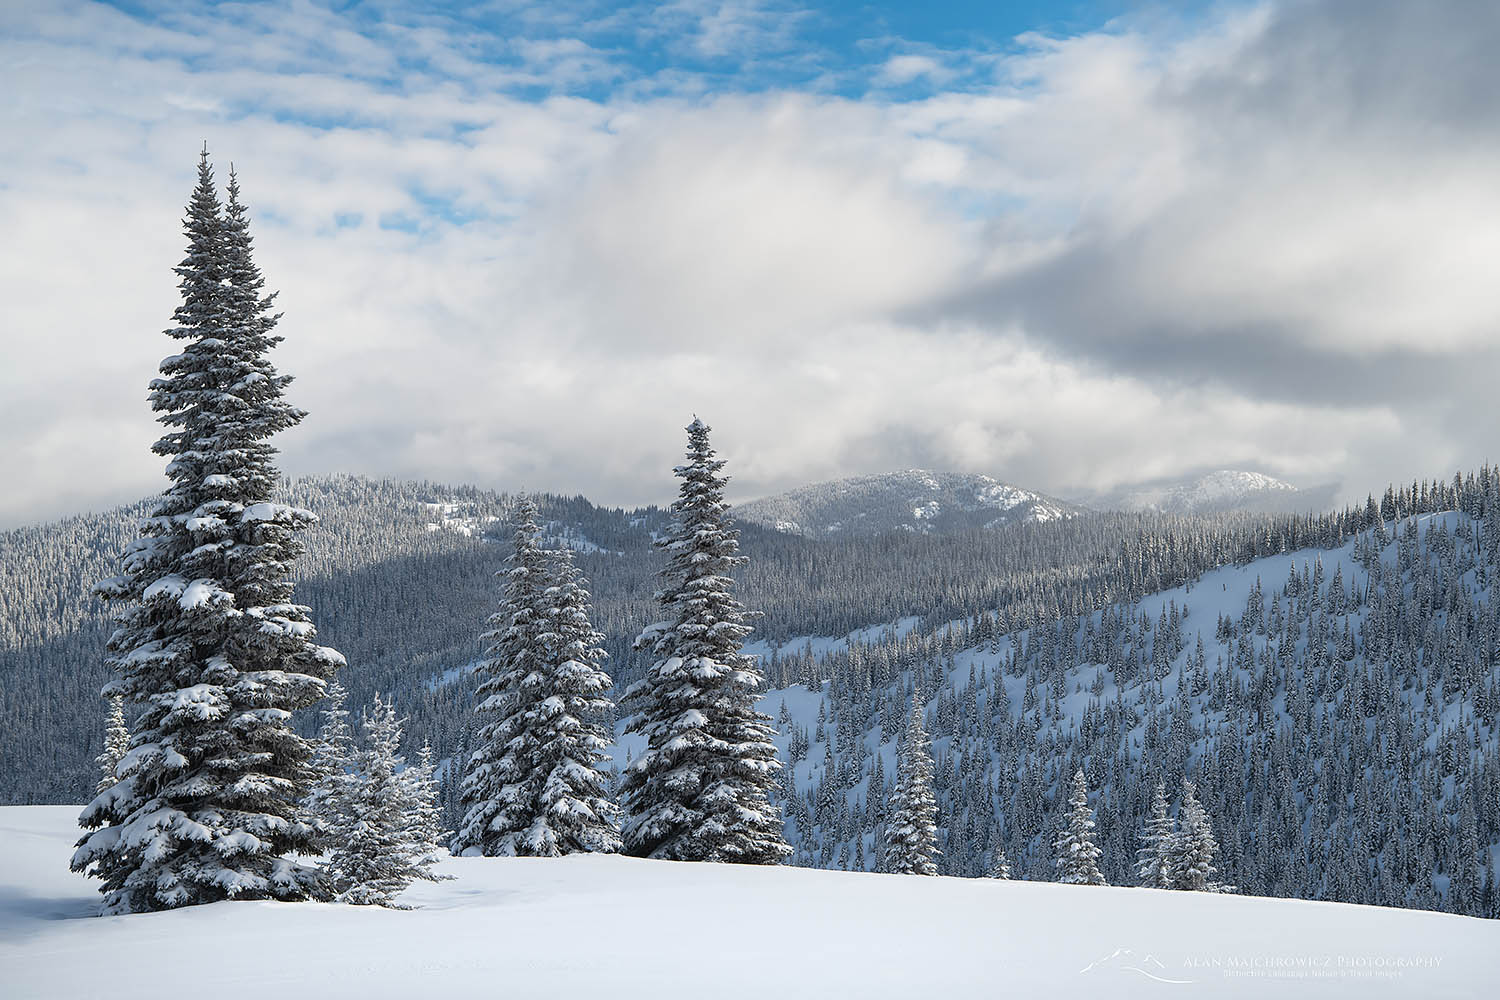
Ideally, you’ll want to be on location just as a storm cycle concludes, leaving the trees* and landscape covered in fresh snow, with the remnant clouds bathed in glowing morning or evening light.

*Essential Tip: Trees that are free of snow tend to lose detail and become silhouettes against a snowy white backdrop. Try to get on location before the snow melts off tree branches.

Your first challenge is to become a bit of an amateur meteorologist.  You’ll need to regularly keep track weather of patterns and trends for your desired destination. Make sure you use several sources, such as NOAA, Weather Network, AccuWeather, Mountain Weather Forecasts, etc.

Observe storm patterns and satellite images on weather sites. Watch the direction they come from and where and how long they last. Also, take note of temperature fluctuations before during, and after a storm. Winter storms often start warm and wet, followed by colder dryer conditions. Look at the bigger picture and find out the seasonal patterns of weather. Let’s take a look at why this is important.

Ice encased trees Winter Photography Trip Planning
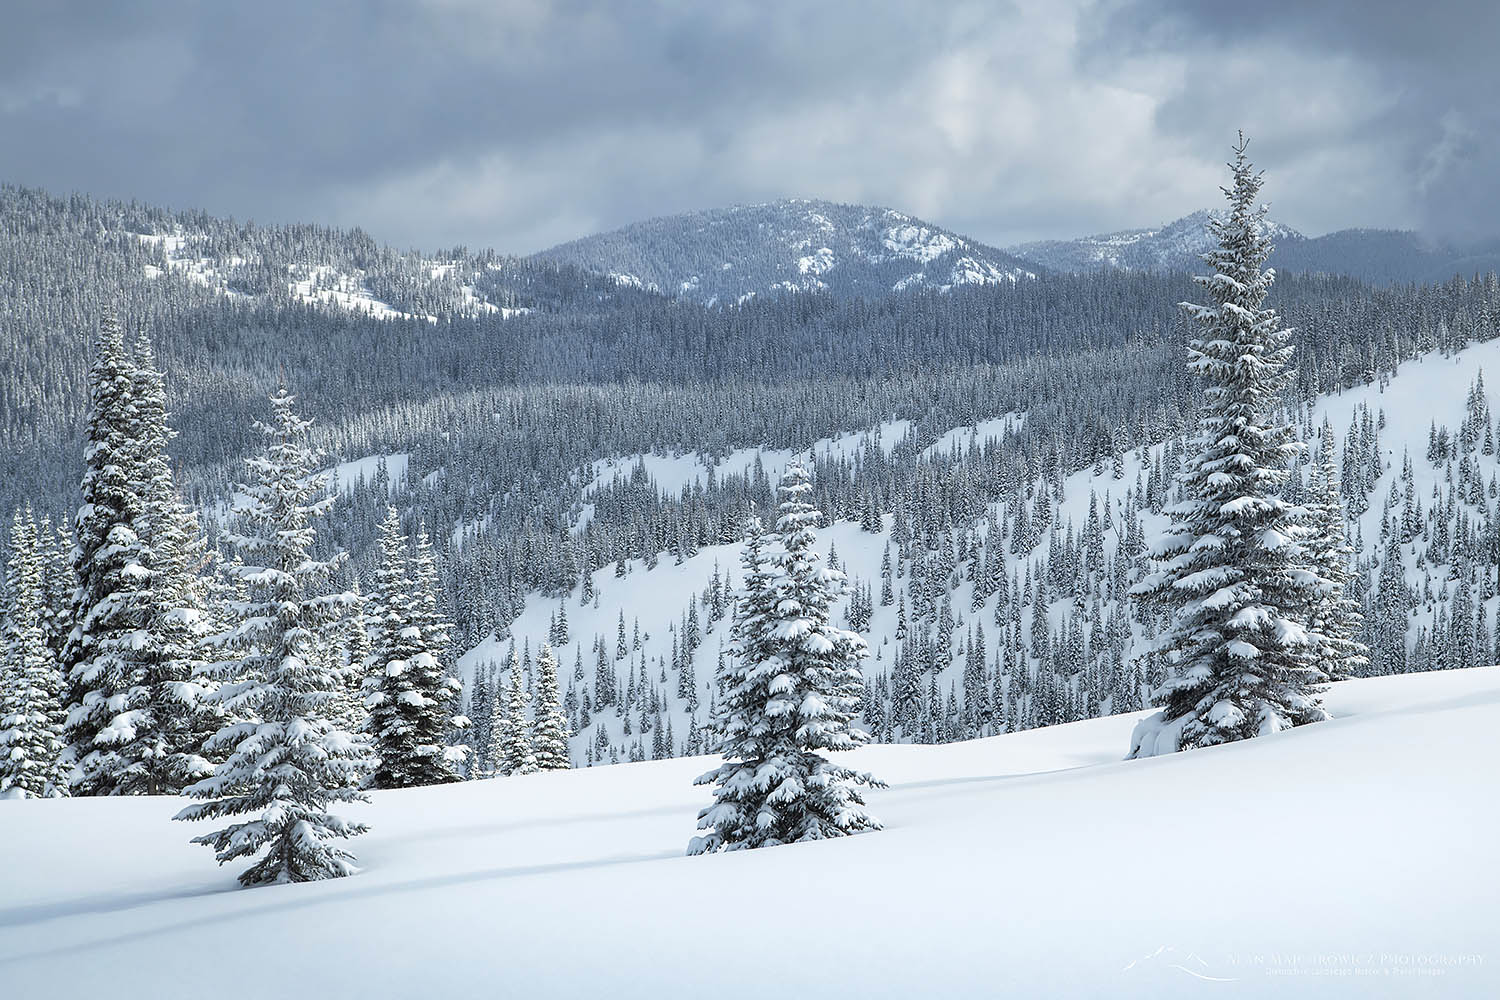
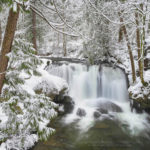
Snow-encased trees North Cascades  #33243  Purchase

Regional Weather and Snow

 
Pacific Northwest storms often dump huge quantities of heavy wet snow in the mountains. Quickly fluctuating temperatures can change the snow to rain in an instant, or vice versa. This is especially true in November and December, the stormiest months of the year. However, January and February have cooler and more consistent temperatures, with more calm periods between storms. Making this a better time to visit locations such as Mount Rainier or Mount Baker. In March the storms ramp up again with more variable temps.
 
Rocky Mountain states and provinces have a completely different scenario. The big difference is temperature. This far inland it’s much colder and dryer. The snowfall amounts will be a lot less, even in major storms. And even more importantly the snow will be dryer and less likely to accumulate on trees. So your window of opportunity to photograph that fresh snowfall may be much smaller.
 
In the Rockies, the cold dry conditions are a great benefit for photographing other winter subjects, such as ice. The consistently colder temperatures freeze waterfalls lakes and rivers, something that is quite rare in the coastal ranges. 

So make sure you educate yourself about the various conditions in different areas, it’ll help get you there at the right time and decide where to go for different subject matter, not to mention when it’s time to hightail it out to the safety of a motel.

Ski Touring Coast Range B.C.Ski Touring Coast Range British Columbia  #50345  Purchase
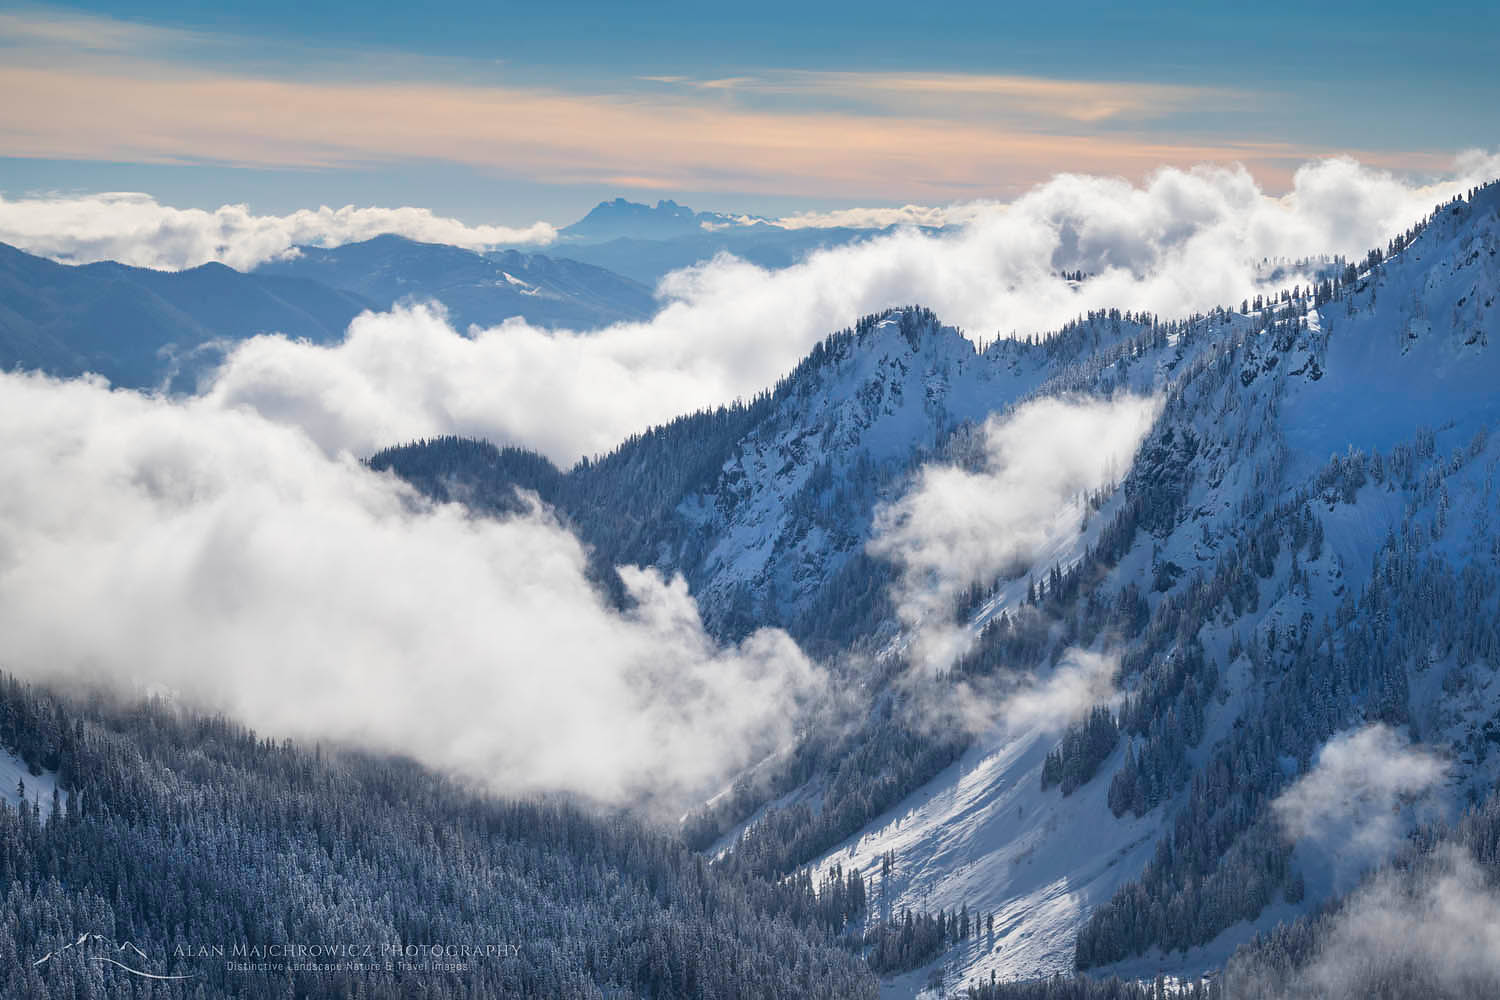
Route Finding:

Well-groomed summer trails to your favorite mountain vista will be under several feet of snow in the winter. There won’t be any trail markers visible, leaving it up to you to find the route.

White-out conditions are especially dangerous. There will be no visible distinction between sky and snow, and it’s very easy to get turned around in a matter of seconds. When traveling on skis in these conditions there can often be a strange and frightening sensation of sliding backward when you’re moving forwards! Even in good weather, a familiar route in winter will look much different than in summer. I’ve been up to Artist Point by Mount Baker dozens of times in the summer. But it always amazes me how unfamiliar the route looks in winter.

Check with park rangers for special winter routes and advice, or go online to local winter recreation forums for advice. For example, due to avalanche dangers, the Paradise area at Mount Rainier has different winter routes specified by the park service.

I’m a firm believer in using a map and route-finding skills, and not relying on GPS, cell phones, and other electronic gadgets. In winter especially you must develop a new set of skills and common sense to get around safely. It is unbelievably easy for things to go wrong in winter. Dead batteries, or losing your phone or GPS in the snow mean disaster.

Abraham Lake AlbertaAbraham Lake Alberta  #43646  Purchase

Winter Photography Tips, Safety:

Avalanches are the biggest hazard on a winter photography trip in the mountains. Never travel alone in any area that is susceptible to avalanches! If you are caught in even a small slide your chances of getting out alive are very slim. However, the science of learning to identify potential hazards is too complex to explain here. 

Visit your local outdoor recreation store to get information on avalanche awareness and safe winter travel in your area. Most likely they will also offer avalanche safety courses or direct you to an organization that does. A good short course will go a long way in keeping you alive and safe. Plus you’ll have fun and probably meet some future travel partners.

Afterward, and before heading into the backcountry, you’ll need to invest in the tools needed for safe travel in avalanche-prone areas. Namely an avalanche beacon*, avalanche probe, and shovel. Expect to pay anywhere from $350-$450 for all three items. Most outdoor retailers sell these items both separately and in a package, which offers a bit of saving on cost.

*Do Not purchase a used beacon that was manufactured before 1990! These older beacons use a different frequency and are not compatible with newer models.

Also, exercise extreme caution on lakes or streams. A snow-covered surface may hide dangerously thin ice.

Frostbite and Hypothermia are the next biggest hazards of photographing in winter. Landscape and nature photography practically requires sitting around in one place waiting for the right lighting conditions. This alone is an invitation to hypothermia. But remember, hypothermia is not limited to winter conditions. It can occur in temperatures of 50º and even higher in windy wet conditions.

When you’re working up a sweat hiking or skiing it is very easy to quickly lose heat and become chilled when resting. Even on a sunny day. Unless you quickly put on dry clothes or an insulating layer hypothermia can quickly set in. Learn what the signs are and act quickly to get warm.

Frostbite or frostnip are serious concerns anytime the temperature gets below freezing. Fingers and toes are most susceptible. Tight-fitting boots and gloves are the biggest causes since they hinder crucial circulation. Tingling numbness and loss of feeling are danger signs.

To prevent both hypothermia and frostbite it is essential to stay dry and wear properly fitting clothes. Keep your core body well insulated and warm and your extremities will fare better.

Ski lift Mount Baker Ski Area Winter Photography Trip PlanningMount Baker Ski Area  #53513  Purchase

Dress for Comfort and Safety:

Always dress in layers. to stay warm and dry you’ll constantly be shedding layers when active, and adding layers when sedentary.

Baselayers are the foundation. You wear it all day and it keeps body heat in and wicks sweat and moisture away. Merino wool is preferred over synthetics. It stays fresher longer and retains heat better than synthetics.

Midweight layers can be a synthetic sweater or vest, or a lightweight down sweater. Keep in mind that when you work up a sweat down will absorb that moisture, causing it to lose its insulation properties. For that reason, synthetic is preferred for this layer.

Insulated jacket. This is where you’ll want to invest in a good down product. When taking a break or standing around waiting for the light you’ll lose body heat quickly. A nice puffy down jacket or parka will trap that heat and keep you warm and cozy.

Shell Jacket and Pants. These can be either hardshell or softshell, but hard shells are preferred for stormy conditions. Just make sure they are well made and are both water and windproof. A lightweight article without insulation is the best and most versatile. Look for lots of easily accessed pockets and waterproof zippers.

Gloves and hats. I always carry two pairs, a fleece liner glove, and an insulated ski gauntlet glove with leather palms and fingers. Mittens can be better for warmth but they’re difficult for performing minor tasks like buckling and pulling zippers. A good beanie hat is essential to keep your head warm. Use a lightweight version or headband for uphill exertion and a heavier one for sitting around.

Winter dawn over Crater Lake and Wizard IslandWinter dawn, Crater Lake National Park #3180  Purchase

Winter Photography Tips, Gear:

Keep it simple and organized: Try and keep your gear to a minimum and keep it organized. One of my absolute biggest frustrations with shooting in winter is dealing with buckles, straps, snaps, and zippers. Every item you’re wearing or carrying seems to latch and get tangled onto these fasteners. Trying to cope with the problem is compounded by the necessity of wearing gloves. Try and choose gear that has a minimum of these things and keep important items in easily accessible pockets or compartments.

Keep it out of the snow: When photographing try and lay your pack, spare jacket, or another large item on the snow, then place needed articles on it to keep them dry and in view. It is incredibly easy to drop a filter or lens cap in the snow right in front of your feet and never find it again!

Keep it dry: Bring along several good microfiber lens wipes and or large cotton bandannas. No matter how hard you try things will get wet or snowy and having an absorbent fabric on hand is indispensable.

Keep Batteries warm: This should go without saying but batteries will quickly lose power in cold temperatures. Modern lithium-ion batteries hold a charge longer and are better than traditional AA or AAA types. Regardless keep them warm in a pocket close to your body.

Keep your camera cold:  Needless to say, your gear will be in cold temperatures for most of the day. Bringing a camera in and out of a car, a warming hut or a lodge will quickly warm it up, causing harmful condensation to form on the lens and camera body.  If this happens, always wipe your gear dry immediately. Better yet, protect them in plastic ziplock bags before bringing them inside.

Tripods:  Using a tripod in deep snow can be challenging. Manfrotto makes tripod snowshoes that will attach to the legs of most tripods. I have a pair of these but have never used them simply because they’re a pain to attach and don’t work well in all the various snow conditions I encounter.

When setting up my tripod I cautiously spread the legs only about halfway or less and sink them into the snow almost monopod style. Since this position isn’t very stable I’ll use a remote to trip the shutter. Spreading the legs out increases your chance of bending, jamming, or breaking them. Be warned that this may not be the best technique but it works for me.

Handle with care: The lower the temperature goes the more susceptible everything is to breakage. Plastic items are the biggest concern, but metal items can become brittle too. Never overtighten anything! Not only is it an invitation to breaking but it will be more difficult to unfasten when wearing gloves.

Filters: Polarizing filters should be used judiciously. It’s very easy to darken a blue sky too much against a white landscape. And just like using them throughout the rest of the year, be careful of vignetting on a wide-angle lens.

If you regularly bring graduated neutral density filters you’ll probably use them in a reverse manner in winter. Meaning the land will need to be darkened instead of the sky. I rarely find a need for these filters in winter, and never take their added weight into the backcountry.

Sawtooth Mountains in winter, Idaho Winter Photography Essential Tips
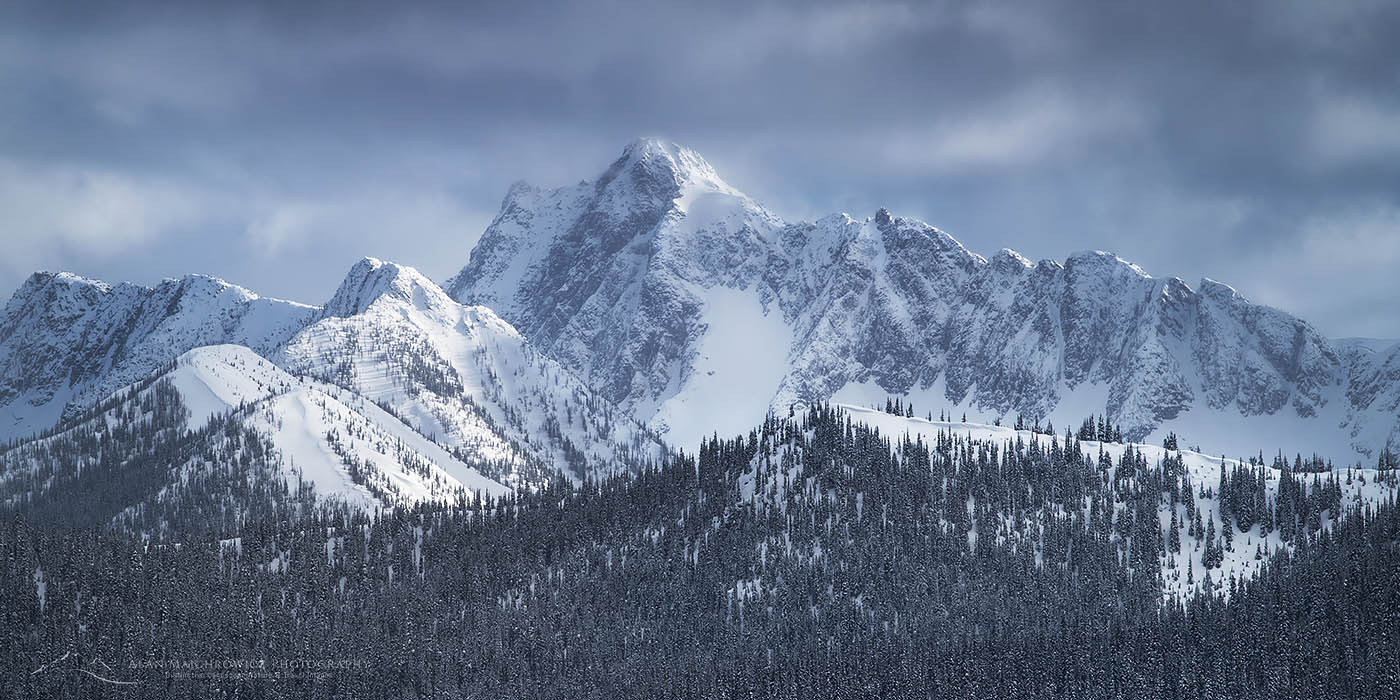
Sawtooth Mountains Idaho #6211  Purchase

Helpful links for Winter Photography

For more Winter Photography Tips check out :
Gearing Up For Winter Photography

Ever wonder what it’s like photographing landscapes and nature for a living? Check out my blog post:
What is it like to be a Professional Landscape Photographer?

If you enjoyed reading Winter Photography Essential Tips please share it with your friends and family.

Want to learn more? Take your Creative Photography to the next level with  Private Instruction and Guided Photo Tours.

All photos appearing in Winter Photography Essential Tips are available for Commercial Licensing and Fine Art Prints. Click on any image to purchase, or contact me for more info!

Winter Photography Tips
Trophy Mountains, Wells Grey Provincial Park British Columbia

Gearing up for Winter Photography

Gearing up for Winter Photography

Trophy Mountains, Wells Grey Provincial Park British Columbia Winter PhotographyTrophy Mountains British Columbia  #3962  Purchase

With fall photography wrapping up most of us are beginning to dream of plans for next year’s photography trips. But what about the next several months? There are plenty of photography opportunities and subjects during the winter months too. But I’m not talking about heading down to the Southwest for desert photography. I’m talking about the cold snowy areas of National, State, and Provincial Parks, many of which are nearly deserted in the winter months.

But before going into tips and techniques of actually photographing in winter let’s talk about how to stay safe and comfortable.

Winter photography is definitely more challenging than photographing in warm summer weather. However, with a little preparation and the proper gear, it can be safe, comfortable, and extremely rewarding. In this post, I’m going to outline some tips on gear, safety, and getting around in winter.

All the various items of winter clothing and gear are generally pretty pricey, but you need to get the best you can afford. The key here is to not skimp on quality. Some items that perform great in summer easily break or break down in cold temperatures. In particular, gas canister stoves are nearly useless in cold temperatures.

Bow Valley in winter, Banff National Park Winter PhotographyBow Valley Banff National Park #43869  Purchase

Winter Photography Clothing:

  • The rule in outdoor safety is cotton kills. Cotton has no insulation properties, leaving you vulnerable to hypothermia. And when cotton is wet it is nearly impossible to dry off in cold temperatures.
  • Merino Wool is your best option for base layers. Unlike traditional wool, Merino wool is softer and isn’t itchy. It’s warm, and comfortable, and stays fresher smelling than synthetics after a few days of wear.
  • Waterproof shell jacket and pants. Look for features such as built-in gaiters, suspenders, articulated knees, hood, and deep pockets with zippers.
  • Down jacket or parka. Absolutely nothing beats down for insulation. Keep it dry and it’ll be your best friend. But get it wet and it’s worse than cotton for insulation. I wear my down jacket when standing around camp or when waiting for the light. However, it’s too warm for heavy exertion, when you risk getting it wet from perspiration.
  • Insulated high-top snow boots. You’ll be trudging through deep snow and standing around a lot. Make sure they fit well. Tight-fitting footwear equals cold feet.
  • Two pairs of gloves or mittens. I have insulated ski gloves with leather palms and fingers and a thinner set of synthetic gloves for better dexterity when working.
  • Hat, sunglasses, and or ski goggles. In addition to the hood on your jacket, it’s wise to bring along a wool or fleece beanie. Also, a good full-face balaclava is essential when it gets really cold and windy. Goggles are great during windier conditions, they provide better visibility and help keep your face warm.
Ski Touring Manning Provincial Park British ColumbiaSki Touring Manning Provincial Park B.C.  #43980  Purchase

Getting Around:

Unless you plan on photographing from your vehicle or on well-packed trails, you’ll need an efficient way to get around in deep snow. How you do that will depend on your goals and location. If you’re photographing in the mountains you’re most likely going to encounter deep snow of varying consistency. Here in the Pacific Northwest, the snow is heavy, wet, and often over 10′ deep. In the Rockies, it tends to be very dry, powdery, and deep too. Regardless of which location it’s no fun post-holing through deep snow in just boots.

  • Snowshoes are a great method for beginners to travel through the snow in a great variety of conditions. They don’t require special skills or boots and are relatively inexpensive. However, don’t assume that you’ll be floating easily on top of the snow. Unless you’re on a packed trail you’ll be sinking in the snow to some degree, and working up a sweat. If you’re hiking through deep, wet, and heavy fresh snow they’re almost as exhausting as post-holing.
  • Backcountry, Alpine Touring (Randonee), Telemark skis, and Split-Board Snowboards. These are, in my experience and personal opinion, the best and most enjoyable ways to access photo subjects in deep mountain snow. You’ll get around easier and faster, and with much better flotation, even going uphill in steep terrain. Plus you’ll have a blast gliding back to your vehicle. The big downsides to these options are the gear can be expensive, and all of them have a much higher learning curve than snowshoes.
  • Cross-country skis are an option only if you’re on a groomed trail or have lots of experience. These skinny skis are generally too narrow for deep untracked snow and are nearly useless for going uphill. And they don’t turn very well on the downhill.
Backcountry skiers North Cascades WashingtonBackcountry Skiers North Cascades #56540  Purchase

Winter Photography Camera Gear Considerations:

In winter you must, of course, care for your camera gear to a greater degree. It’s quite a challenge to stay dry and keep snow off of your gear.

  • A good backpack-style case is essential If you’re going out for more than a few minutes. A good quality backcountry ski pack is a wise investment. Most traditional camera backpacks don’t have enough room for extra clothes, water, snacks, and other essential items necessary for winter travel.

For day trips I suggest finding a quality pack with around 2000-3000 cubic inches of storage. Dedicated ski packs have the advantage of being designed for winter backcountry travel, with room for essential safety equipment, such as shovels and avalanche probes. They are generally more waterproof and have features that can be accessed with gloved hands.

Another good idea is a camera case with a chest harness. This will give you quick access to your camera when snowshoeing or skiing. And it will keep you from constantly unloading your main pack in the snow whenever you come across a subject.

  • Batteries. Always bring extras and have them fully charged before heading out. Today lithium-ion is far superior and more reliable than standard AA batteries. But they are not immune to cold conditions, keep them warm in your jacket if you can.
      • Microfiber cloths and towels. The Hitchhikers Guide to the Universe states “A  towel is about the most massively useful thing an interstellar hitchhiker can have…” This is also true for winter photography. Despite your best efforts, you will constantly be wiping snow and moisture off your gear. Not to mention the constant fogging lens, filters, and camera bodies will get as you handle them. At least one microfiber cloth is essential, but take three for good measure.

Backcountry Safety warning sign Mount Baker Ski AreaBackcountry Safety Warning Mt. Baker Ski Area #56529  Purchase

Safety Considerations:

There are plenty of risks to consider when photographing in a winter environment.  Among them are traveling in avalanche terrain, hypothermia, frostbite, thin ice on lakes and streams, and getting your vehicle stuck. Nearly all of them can be avoided by careful planting, a good amount of caution, and common sense. Listed below are a few basic items you should never leave home without.

  • A Backcountry style snow shovel is a must. They’re strong, lightweight, and great for a variety of uses. Its main safety purpose is digging out an avalanche victim. But they are also useful for digging out your car after a storm and making a seat or shelter in the snow.
  • Avalanche transceivers and probes are essential if you’re planning on traveling into the backcountry through questionable terrain. However, these items are of absolutely no use if you are not trained in using them.  Always travel with companions and make sure everyone has avalanche rescue and awareness training!
  • Tire chains or other traction devices for your vehicle. Never leave home without these. Conditions can change rapidly throughout the day, and a bare dry road in the morning can have inches or feet of snow on them in the afternoon. Most mountain highways require them during the winter months anyway.
  • Jumper cables and or a portable jump starter are also a must. Imagine charging up camera batteries, a smartphone, and or a laptop while sitting in your car waiting for the snow to stop, only to find out your car battery is dead. Not a good feeling!
  • Gas camping stove and extra food. After a day in the snow and cold, it’s nice to have a hot drink. It can also be a lifesaver if you’re cold and on the verge of hypothermia. I always carry a large propane tank in my truck along with a two-burner camp stove. To keep it going in cold weather I need to replace the regulator on the stove every year or so. For the backcountry, I always carry a white gas MSR XGK. Unlike today’s popular gas canister stoves, this stove performs flawlessly in the coldest conditions.
  • Extra dry clothes and a sleeping bag. If you worked up a sweat, or all your clothes are wet you’ll appreciate changing into dry clothes back at the car. A sleeping bag is essential if a surprise storm prevents you from driving home.

North Cascades Highway closure Winter PhotographyNorth Cascades Highway in winter #56605  Purchase

Coming up next

For even more information on planning an outing, day trips vs. overnight backcountry trips, weather, and other considerations check out:
Essential Winter Photography Tips

If you enjoyed reading Gearing up for Winter Photography please share it with your friends and family.

Ever wonder what it’s like photographing landscapes and nature for a living? Check out my blog post:
What is it like to be a Professional Landscape Photographer?

All photos appearing in Gearing Up for Winter Photography are available for Commercial Licensing and Fine Art Prints. Click on any image to purchase, or contact me for more info!

Castle Peak North Cascades

Manning Park Winter Photography

Manning Park Winter Photography

Castle Peak North CascadesCastle Peak North Cascades #64796  Purchase

Last week I made a trip to Manning Provincial Park for winter photography and skiing fun. Weather forecasts were for cold temperatures and a good amount of fresh snow. Perfect conditions to make some new winter photos.

Manning Provincial Park is a large park in southern British Columbia. It encompasses the northern reaches of the North Cascades Mountains, along the U.S. Washington State border. On the U.S. side, the mountains present a rugged appearance with high jagged peaks. However, in Manning Park, the range mellows out into high mountains with more rounded summits. Just north of the park the North Cascades ends, and gives way to the Thompson Plateau.

Gibson Pass Ski Area, Manning Provincial ParkGibson Pass Ski Area Lifts  #64771  Purchase

Skiing Manning Park

In summer hikers in Manning Park can find some great trails offering high views and meadows of wildflowers. In winter the park offers a network of cross-country ski trails in addition to the small Gibson Pass downhill ski area. Backcountry skiers and snowshoers can also find fresh snow and solitude on the Fat Dog ski route to the Brothers Mountain group.

On this trip, I took advantage of both the Nordic trails and downhill ski runs. Manning Park’s Gibson Pass Ski Area offers a bit of a unique experience in the Pacific Northwest. Most ski areas in this region receive a copious amount of heavy wet snow, often referred to as Cascade Concrete. Manning Park, on the other hand, often has colder powdery snow, due to its more inland location.

A few other things set Manning apart. For one it has a laid-back retro feel perfect for families and avoiding adrenaline junkies. Also, while the big resorts like Whistler Blackcomb charge a staggering $180 (Canadian) for a single lift ticket, Manning charges only $59 (Canadian). Plus, there are usually no lift lines. On my recent midweek visit, I skied directly onto the chair each time! The downside to these benefits is that there are only two chair lifts, with only one operating in midweek. The vertical drop is a modest 1400′.

North Cascades Winter, Manning Provincial ParkManning Park in Winter  #64780  Purchase

Winter Photography in Manning

While the Nordic trails are fun, they usually don’t offer much in the way of landscape photography. Therefore I made a point of taking advantage of the views offered from the top of the ski lifts. From the ridge top, the views south into the Washington North Cascades are very good. The two dominant peaks in that direction are Hozomeen Mountain and Castle Peak. Further off west are the jagged peaks of Mount Spickard, Mox Peaks, and the northern Pickets, in North Cascades National Park. To the north are the rounded summits of Three Brothers and Big Buck Mountains.

To photograph the twin summit towers of Hozomeen and the Pickets you’ll want to be on the ridge top early in the morning. However, unless you hike up to the ridge before dawn you’ll be limited by the ski lift schedule. The lifts open at 9:00 so you’ll miss the sunrise. Of course, depending on lighting and snow conditions you can still make good photos throughout the day. If you want to get to the top only for the views, you can purchase a one-trip lift ticket.

Later in the afternoon both Castle and Frosty Mountains will begin to receive warmer light. Note that until late spring the north faces of Castle and Hozomeen will be mostly in shadow.

North Cascades Winter, Manning Provincial ParkManning Park in Winter  #64783  Purchase

Timing is Everything

While having great light is always imperative in photography, another important consideration for winter photography is timing the snow conditions. In winter most of the landscape will have a blanket of snow over it. However, trees and forests without snow on them will become black holes for light against all that white.

In my opinion and experience, the best conditions can be had just after a storm dumps fresh snow on the trees. This sounds simple and obvious, but it can be tricky. Often in the Northwest, a warmer wet snowstorm is followed by sunny conditions, which melt snow off tree branches very quickly. That pristine scene can be gone within a few hours!

Frosty Mountain North Cascades British ColumbiaFrosty Mountain Manning Park  #64791  Purchase

Colder drier locations such as the Rockies present another dilemma. The snow can be so cold and dry that very little to no snow may adhere to tree branches. Unlike the coastal Northwest where wet snow acts like glue on everything. In cold locations and conditions, a slight breeze can also remove the snow as easily as warm sunshine.

In the end, winter photography can be more fickle than photographing spring wildflowers or perfect autumn colors. Depending on weather patterns where you live or are able to travel, there may be only a couple of good opportunities a season. So keep a close eye on those forecasts and be ready to go at a moment’s notice!

North Cascades Winter, Manning Provincial ParkManning Park in Winter  #64778  Purchase

If You Go to Manning Park

Driving time to Manning Park is about 4.5 hours north of Seattle, and two hours from Vancouver. Winter camping is available, as are RV hookups at Gibson Pass Ski Area. Manning Park Resort also offers excellent lodge and cabin facilities, along with a restaurant grocery store, and gas. Cell phone signal is limited to the immediate lodge area.

Want to Learn More?

Would you like to learn more about photographing in Manning Park and or winter photography? I offer full-day, half-day, and multi-day photo tours and instruction. Check out my Private Instruction/Tours page for more info, or contact me directly. I would love to help you take your photography to the next level and shoot like a pro!

Mount Shuksan in winter North Cascades

Photographing Heather Meadows Winter Landscapes

Photographing Heather Meadows Winter Landscapes

Mount Shuksan in winter North CascadesMount Shuksan From Austin Pass #64716  Purchase

Heather Meadows Recreation Area is located adjacent to the Mount Baker Wilderness in the North Cascades. Magnificent scenery and numerous hiking trails are the highlights of this special place. In summer visitors can drive to Artist Point on Kulshan Ridge for incredible views of Mount Baker in one direction, and Mount Shuksan in the other. Further down is one of the most iconic mountain scenes in the world, Mount Shuksan reflected in Picture Lake.

In winter Heather Meadows is just as popular a place to visit. The adjacent Mount Baker Ski Area is open, and throngs of backcountry skiers and snowboarders search for untouched powder. January usually provides some breaks in the winter storms, so it’s a good time to make the trip up.

I’ve been visiting Heather Meadows in winter for over twenty years. Mostly for photography but also for the pure exhilaration of the views and crisp cold air. Even though I’ve skied up to Artist Point on Kulshan ridge numerous times I always find something new to photograph. Different lighting conditions and reshaping snow pack will always dress up the scene in a new way. All the photos in this post were made a few weeks ago on a crisp day in late January.

Mount Shuksan in winter North CascadesMount Shuksan and snowdrift Kulshan Ridge #64337  Purchase

Up near the ridge you can find wonderful shapes and patterns in the ever changing snowdrifts. If you are lucky enough to visit just after a heavy storm you’ll also see old growth mountain hemlock trees encased in snow and ice. Also, if you are extraordinarily lucky you may get a glimpse of a steam plume from Mount Baker’s volcanic crater glowing in the evening light!

Swift Creek Valley North Cascades WashingtonSwift Creek Valley from Kulshan Ridge #64728  Purchase

Winter Travel Gear Tips

If you go there are a few things to keep in mind. Snowshoes, backcountry skis, or split-board snowboards are the most efficient means of getting around. Skinny cross country skis, or booting it in for even a short distance from the parking lot is exhausting in the deep snow, you’ll be drenched in sweat within minutes. Artist Point is less than two miles and 900′ elevation gain from the parking lot. However, with all your extra winter travel gear that distance can seem much longer.

Don’t even think of going  during poor weather! Whiteout conditions, heavy wet snow, and increased avalanche danger does not make for an enjoyable outing. It seems every year there a couple of fatalities directly attributed to those types of conditions. The main route up to Artist Point and Kulshan Ridge is usually safe from avalanches. However, under certain conditions a few areas can  be dangerous.

I won’t get into too much detail regarding essentials, but make sure you take the following:

  • Extra warm clothes, it can be windy and much colder on the ridge.
  • Plenty of liquids to stay hydrated
  • High energy snacks
  • Insulated pad to sit on
  • Avalanche beacon, probe, shovel, and knowledge of how to use them.
  • Knowledge of current weather and avalanche forecasts
  • A partner, especially important if you’re new to the area in winter, or venture beyond Artist Point
  • Common Sense!

Nooksack Ridge in winter North Caascades WashingtonNooksack Ridge from Heather Meadows #64748  Purchase

Photo Gear and Tips

Just like photographing wildflowers in spring or colorful fall foliage, winter photography is all about timing. Maybe even more so. I’m always on the lookout for good conditions. Such as after a good storm covers the trees and peaks in a fresh blanket of snow. Of course it must not be too warm or the snow will quickly melt off the trees and leave them black silhouettes against the white snow.

Photographing from Artist Point, Mount Baker is best photographed in the early morning. Mount Shuksan is best photographed in late afternoon to evening. For Shuksan late winter or early spring is preferred, since the angle of the sun won’t be as low. You’ll get more light on the glaciers then.

For lower down in Heather Meadows morning light can be optimal. Some of the best conditions I’ve seen here are when low clouds or fog are just beginning to lift.

Backcountry skiing North Cascades WashingtonBackcountry skier and tracks North Cascades #64732  Purchase

If you are envisioning untouched pristine snow in your photos you’ll have to get there very early, and immediately after a good snowfall. Backcountry skiing and riding has exploded over the years. Therefore, even the most remote and steepest backcountry terrain is tracked out by midmorning. It’s now nearly impossible to make a photo anywhere in the Heather Meadows area without numerous tracks everywhere.

Before digital I often trekked the meadows and up to the ridge with a 4×5 large format camera, and all its the weighty accessories. Several times I even did it with a full overnight winter pack! Digital has simplified and lightened the load somewhat. Here are a few basic items I always bring along.

  • Tripod
  • Polarizing filter
  • Some form of remote release
  • Plenty of microfiber lens cleaning clothes, you will drop things in the snow!
  • Extra batteries

Want to Learn More?

Would you like to learn more about winter photography? I offer full day, half day, and multi-day photo tours and instruction. Check out my Private Instruction/Tours page for more info, or contact me directly. I would love to help you take your photography to the next level and shoot like a pro!

American Border Peak and Mount Larrabee in winterCanadian Border peak and Larrabee Peak #64754  Purchase

Whatcom Falls Bellingham Washington

Whatcom Falls Winter Photography

Whatcom Falls Winter Photography

Whatcom Falls Bellingham Washington Whatcom Falls Winter PhotographyWhatcom Falls Bellingham, Washington #64764  Purchase

This week much of western Washington was hit by a series of snow storms. Snow amount totals vary, but my home in Bellingham topped off with around 12″. What’s more is that it’s staying cold throughout the week, keeping it all from melting. For most areas of the country 12″ of snow isn’t a big deal. But for us living in the coastal lowlands snowfall of any amount is exciting!

Whatcom Falls Bellingham WashingtonWhatcom Falls Bellingham, Washington #64762  Purchase

Whatcom Falls is a Bellingham City park that is only about a mile from my home. The falls are the main attraction but the park also boasts a beautiful old growth forest with towering fir and cedar trees, and numerous hiking trails.

The last time I was able to photograph Whatcom Falls in the snow was around 2008. So to take advantage of the situation I visited the falls three times. Photographing the falls any time of year is ridiculously easy. There is a stone arch bridge spanning the creek at a perfect viewpoint. All you need is a tripod, a lens in the 24-55mm range and maybe a polarizer.

Whatcom Falls Bellingham Washington Whatcom Falls Winter PhotographyWhatcom Falls Bellingham, Washington #64765  Purchase

Whatcom Falls Bellingham Washington Whatcom Falls Winter PhotographyWhatcom Falls Bellingham, Washington #64761  Purchase

Want to Learn More?

Would you like to learn more about winter photography? I offer full day, half day, and multi-day photo tours and instruction. Check out my Private Instruction/Tours page for more info, or contact me directly. I would love to help you take your photography to the next level and shoot like a pro!

Methow Valley Washington in winter

Methow Valley Winter

Methow Valley Winter

Methow Valley Washington in winterClearing fog near Mazama, Washington #56617  Purchase

Last month I made a quick trip to the Methow Valley in north-central Washington for some much-needed fresh air exercise and photos. The weather in western Washington had been fairly warm and rainy. So I headed to the east side of the North Cascades for a quick fix of winter conditions.

The Methow Valley is renowned for its extensive network of perfectly groomed cross-country ski trails and dependable snow cover. The area is also very popular with snowmobilers and backcountry skiers. They access the high country via the closed North Cascades Highway. On this trip, I stayed in the upper part of the valley near the Mazama area where I knew of several good spots for photographing if the light was right. Here are a few of the highlights from this trip.

Methow Valley barn, WashingtonBarn near Mazama, Washington #56601  Purchase

North Cascades Highway winter road closure near Mazama, WashingtonNorth Cascades Highway winter closure, near Mazama, Washington #56605  Purchase

Cross country skiing Methow Valley North CascadesCross-country skier on Methow Valley trails #56646  Purchase

Also, check out Methow Valley Fall Foliage to see another season in the Methow!

Leave No Trace

Please follow the guidelines of Leave No Trace (LNT). The Methow Valley and all other natural areas throughout the world are under incredible pressure from growing amounts of visitors. Please do your part to help preserve these precious areas for future generations!

To learn more about the principles and practicing LNT please take a few minutes to visit the Leave No Trace Center for Outdoor Ethics. Your children and grandchildren will thank you!

Seven Leave No Trace Principles

  • Plan ahead and prepare.                                       
  • Travel and camp on durable surfaces.                 
  • Dispose of waste properly.                                                                         
  • Leave what you find.                                            
  • Minimize campfire impacts (be careful with fire).
  • Respect wildlife.  
  • Be considerate of other visitors.

*Also, be respectful of private property. Many of the locations in this post are adjacent to private property. The Methow Valley Trail system often crosses private property boundaries and exists due to the blessing of local property owners. 

Photos appearing in Methow Valley Fall Foliage are available for Commercial Licensing and Fine Art Prints. Click on any image to purchase, or contact me for more info!

Table Mountain North Cascades Washington

Winter Heather Meadows Recreation Area

Winter Heather Meadows Recreation Area

Table Mountain North Cascades WashingtonTable Mountain Heather Meadows Recreation Area 56528  Purchase

Every winter for nearly twenty years I’ve made at least one visit to Heather Meadows Recreation Area. I come here for a variety of reasons, such as being close to home and one of the few places in the North Cascades with relatively easy access to subalpine and alpine terrain. Also because the scenery is some of the best in the state and the ever changing patterns of snow and light make for unique winter photography opportunities.

On this first trip of the 2015-2016 winter season I came mainly to begin getting in shape and acclimated for upcoming ski-photo tours. Last year was a near bust as far as snowpack is concerned, but so far this year winter storms have pounded the mountains resulting in a pretty impressive base. As of this writing the Mount Baker Ski Area reports 146″ in the upper runs, with more storms lined up waiting to dump more snow. The first break in the weather I’ll head back up for a few days of winter camping and photography.

Backcountry skiers North Cascades WashingtonBackcountry skiers heading up to Artist Point 56540  Purchase

Mount Baker in winter North CascadesMount Baker from Artists Point 56535  Purchase

Nooksack River North Cascades WashingtonNooksack River back down in the valley 56544  Purchase


Heather Meadows Recreation Area in winter

North Cascades Winter

North Cascades Winter

Heather Meadows Recreation Area in winter North CascadesTable Mountain North Cascades #1644b  Purchase

This image of Table Mountain was made near the Mount Baker Ski Area during the record snowfall winter of 1998-99. That epic winter the ski area received a whopping 1140″ of snow. I couldn’t find out what the actual base was but it was enough to have people specially hired to dig out the lifts! It should be noted that this total is from November 1, 1998, to May 12, 1999.

If these statistics aren’t impressive enough you should also be aware that Mount Baker itself, would receive many times the amount of snow than the ski area. No wonder it is perhaps the snowiest glacier-cloaked peak in the lower 48 states.

Today however is a different story, the record year of 1999 is a distant memory. Last winter Northwest ski areas barely managed to keep open for a partial season. Due to unusually warm temperatures and little snow.

Since we are still in the grip of that same El Niño weather pattern the forecasts don’t look much better for this winter. But let us be optimistic, it’s only the second week in November. The mountains are already receiving snow from fall storms. Albeit in higher elevations and still a little warmer than normal.

In the meantime, I’m going to start scheduling some winter photo trips and getting my skis and other gear in shape!

Winter dawn on Mount Baker, North Cascades Washington Mount Baker in winter #47031  Purchase


Marriott Basin, Coast Mountains British Columbia

Marriott Basin Winter Photography

Marriott Basin Coast Mountains Winter Photography

Marriott Basin, Coast Mountains British ColumbiaCoast Mountains Sunset British Columbia 50319  Purchase

Yesterday I finished editing and uploading all the new images from my recent Marriott Basin Coast Mountains Winter Photography trip in the Coast Mountains of British Columbia. on this trip I was I was honored to be accompanied by Vancouver Photographer Adam Gibbs. I don’t know if Adam somehow brought along a good measure of luck, since we enjoyed several outstanding displays of light during our stay.

Marriott Basin has been on my must visit winter list for a number of years now. However, it has been routinely put off due to poor snow and weather conditions. This year, following a series of storms, forecasts showed an extended period of good weather. I knew it was time to make the trip.

Wendy Thompson Hut in winter Marriott Basin, Coast Mountains British ColumbiaWendy Thompson Hut Marriott Basin British Columbia 50424  Purchase

Skiing to the Wendy Thompson Hut in Marriott Basin

The basecamp for this trip was to be the Wendy Thompson Hut, operated by the Whistler section of the Alpine Club of Canada. Wendy Thompson was a ski patroller and paramedic. She died tragically in 1995 at the age of 33 in a Medivac flight crash in the Queen Charlotte Islands. As a memorial and legacy to Wendy, her parents and the ACC worked with volunteers to build this hut.

I routinely use skis to access many winter backcountry locations, but I’m definitely not the most graceful or competent skier. Especially when carrying a multi-day pack loaded down with camera gear! Since we were staying at a hut I didn’t need to pack a tent or a few other items, however my pack was still heavy with camera gear and extra winter clothing. Fortunately due to  several parties exiting the hut the day before we arrived, we didn’t need to break trail through deep snow.

Wendy Thompson Hut in winter Marriott Basin, Coast Mountains British ColumbiaWendy Thompson Hut Marriott Basin British Columbia 50328  Purchase

The first mile or so is easy, traveling along a summer access road. Soon after the road ends the real work begins. Almost immediately the route tackles a steep forested headwall. This section is hard enough in summer, but in deep snow with a heavy pack and skis it becomes a grueling task. Sooner than it seems the grade eases up and the forest begins to open up. From here to Lower Marriott Lake there are several areas of possible avalanche danger.

At the head of Lower Marriott Lake is the last steep section to climb before reaching the hut. After several hours of hard work the sight of the hut is a welcome relief!

Marriott Basin in winter, Coast Mountains British Columbia CanadaWinter Alpenglow over Marriott Basin British Columbia 50319  Purchase

Evening Photography at Marriott Basin

Upon arriving at the hut, settling in, and quenching our thirst with some hot drinks, it was time to scout out nearby photo locations. When we started out earlier in the day the sun was shining in a blue sky with a few wisps of high altitude clouds. However by the time we arrived at the hut clouds had moved in, turning the sky a solid grey. Fortunately within a few minutes of checking out possible locations, the sun broke briefly through the clouds. The surrounding peaks were tasking on a warm glow, and I knew that it was time to get to work. I quickly managed to find a knoll close by that afforded an unobstructed view of the basin and peaks with some good foreground material to work with.

After setting up the first few photos it became apparent that the clouds were beginning to dissipate to create all the elements for an epic sunset and alpenglow. I quickly got into the zone and worked hard at composing as many different images as possible. Considering all the cloudless smoke hazed locations I experienced last August and September this was payback time in a big way!

Backcountry ski touring in Upper Marriott Basin in winter, Coast Mountains British ColumbiaMarriott Basin ski touring 50336 Purchase

Touring  Upper Marriott Basin

The next day Adam and I went on a short ski tour to explore the upper basins above the hut. Shortly above the hut the terrain enters a true alpine landscape with wide open views in all directions. Carrying only a day pack on mostly hard packed snow the skiing was very pleasant, and I took my time to enjoy it all! In summer this area is filled with endless boulder fields and small lakes. However, in winter this is all covered in snow, which the wind has blown into beautiful shapes and patterns.

Backcountry ski touring in Upper Marriott Basin in winter, Coast Mountains British ColumbiaMarriott Basin ski touring 503353 Purchase

Mount Rohr, Coast Mountains British ColumbiaWinter sunset over Mount Rohr #50381

Later in the day the light once again put on a grand display. The clouds on this evening appeared stacked in layers as the setting sun illuminated them. This time I worked mainly with short to medium telephoto compositions to close in on the clouds behind the ridges so as not to duplicate the wide angle photos from the first evening.

If You Go

The hut in Marriott Basin is a little less than 5 miles in with around 1600′ elevation to gain. The trailhead to the hut is at Cayoosh Pass about an hour northeast of Whistler. You must contact the ACC of Whistler to reserve a place for a nominal fee. They will also provide you with access details.

The hut is heated by a wood stove and is equipped with pots, pans, and eating utensils. However, you’ll need to provide your own stove and fuel to cook with. There is also electricity via solar panels, and even USB outlets. Make sure you bring a good winter sleeping bag, in case there is no wood left for the stove, or enough bodies to heat the hut.

In winter backcountry skis, snowshoes, or split-boards are your best options. Skinny cross country skis are definitely not ta good option. Also, make sure you carefully consult the most recent avalanche reports before you go.

It also should be noted that the entire area surrounding Marriott Basin offers excellent ski touring opportunities. While this trip was primarily for landscape photography, there are countless downhill runs for skiers to explore. Everything from safe and easy, to life threatening expert lines. An excellent map of the area is available through Backcountry Skiing Canada.

Upper Marriott Basin in winter, Coast Mountains British ColumbiaMarriott Basin Coast Range British Columbia 50356  Purchase

Upper Marriott Basin in winter, Coast Mountains British ColumbiaUpper Marriott Basin Coast Range British Columbia 50352

Upper Marriott Basin in winter, Coast Mountains British ColumbiaUpper Marriott Basin Coast Range British Columbia 50343  Purchase

Marriott Basin Winter Photography