Coyote Gulch, Glen Canyon National Recreation Area Utah #76072or

Coyote Gulch Backpacking Photography

Coyote Gulch Backpacking Photography

Coyote Gulch, Glen Canyon National Recreation Area Utah #76072or
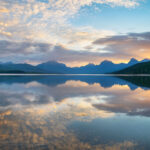
Coyote Gulch  #76072or  Purchase

Southwest Utah has some of the finest desert backpacking opportunities in North America. The area boasts 5 national parks, 8 national monuments, and 7 state parks. In addition, it has the largest concentration of natural arches, bridges, and slot canyons in the world. If that’s not enough for you many of these features also spill over into Northern Arizona.

So, where to start? Well, that depends of course not only on your interests, but also on your fitness, experience level, and time available. Some of the best trips are into the mazes of canyons. These trips usually offer more shade and dependable sources of water, two important considerations in the desert. At the top of the list for many is a trip into Coyote Gulch in Glen Canyon National Recreation Area.

Waterfall in Coyote Gulch Glen Canyon National Recreation Area Utah #76147aCoyote Gulch Waterfall  #76147a  Purchase

A Coyote Gulch backpacking trip has all of the best features of the Southwest packed into one trip. High canyon walls, arches, natural bridges, lush riparian areas, and waterfalls, are a desert rarity. In addition, a trip into Coyote Gulch is doable by most backpackers and requires no canyoneering experience.

In addition to Coyote Gulch being an outstanding backpacking trip, it can be a trip of a lifetime for photographers. All the features mentioned above are also prime subject matter for landscape and nature photographers. As I mentioned in my previous post, Southern Utah Photography Tips, the quality of reflected light in Coyote Gulch is outstanding.

For this post, I’ll be giving tips for the average backpacker and photographer. Depending on the source, entry point, and length of trip, a multi-day Coyote Gulch Backpacking trip is rated moderate to difficult.

Jacob Hamblin Arch in Coyote Gulch, Glen Canyon National Recreation Area Utah #7599Jacob Hamblin Arch #75998  Purchase

Highlights of Coyote Gulch

One of the best, if not the best, attractions of a Coyote Gulch visit is Jacob Hamblin Arch.  This large arch is located in a horseshoe bend amidst high sandstone walls. While not the largest arch in the Southwest its setting makes it one of the most impressive, and a must-see for any visitor. Adjacent to the arch is an enormous alcove with some impressive acoustics.

Further downstream Coyote Natural Bridge is another interesting attraction. And a mile or two further is Cliff Arch,  a spectacular area that includes beautiful waterfalls. If you venture to the end of Coyote Gulch the final coup de grâce is the confluence with the Escalante River and a view of Stevens Arch, high above the canyon floor. Aside from these attractions are the wonderfully sculpted sandstone canyon walls painted with streaks of desert varnish.

With these features alone Coyote Gulch would be worth a visit. But it’s the lush vegetation that adds a finishing touch to the masterpiece. In fall the cottonwood trees blaze yellow, making a trip into Coyote Gulch a near-mystical experience.

Steam flowing through giant alcove adjacent to Jacob Hamblin Arch in Coyote Gulch, Glen Canyon National Recreation Area Utah #76338Coyote Gulch #76338  Purchase

Photographing during a Coyote Gulch Backpacking Trip

All of the highlights in the above section are great subject matter for photographers. For a photographically successful trip, there are a few things you’ll need to keep in mind.

First, reflected, or bounced light, is one of the hallmarks of canyon country photography. This is when the sun hits one side of the canyon and then reflects on the opposite side, giving a beautiful warm natural glow to sandstone rock. Without it, the walls of slot canyons and many other formations would appear dull and lifeless.

In most instances, a sunny cloudless sky is usually not favorable for landscape photography. But when you’re working in a canyon with high walls it’s just the thing you need.

Sand and mud patterns resembling a horshoe crab in Coyote Gulch, Glen Canyon National Recreation Area Utah #76326Mud patterns in Coyote Gulch  #76326  Purchase

Another element to be aware of when photographing in Coyote Gulch is its wonderful shapes and patterns. The curving walls and ceilings of alcoves, streaks of desert varnish on sandstone walls, and ripple marks in mud and sand all make for unique and interesting compositions. Add to this trees blazing in fall color and you have all the elements of great landscape and nature photography.

Essential Tip:

Always be observant and look around for interesting photo opportunities. Slow down, give yourself plenty of time, and be willing to stop to take photos.

Essential Gear Tips:

Towards the end of this post, I’ll suggest some camera gear to bring along. But one of the most important items you’ll need is a good wide or ultra-wide-angle lens. If you want to take some great photos of Jacob Hamblin Arch and the nearby alcove you’ll need an ultra-wide lens to fit it all in.

Secondly, you’ll need to bring along a good tripod. Alcoves and other areas in deep shade will require long exposures which are difficult to achieve handheld. Similarly, achieving the silky texture of waterfalls will require a tripod for long exposures.

Cottonwood tree in Coyote Gulch, Glen Canyon National Recreation Area Utah #76078Cottonwood tree in fall color Coyote Gulch #76078  Purchase

Best Seasons for Coyote Gulch Backpacking Trips

Spring and Fall are the two best seasons for a Coyote Gulch backpacking trip. The temperatures are mild and the dangers of flash flooding are minimal. Mosquitoes and flies can be irksome in summer but are at their minimum during spring and fall. In spring the vibrant greens of trees and bushes are an outstanding contrast to the warm hues of the sandstone canyon walls. Of course, the reason is similar in fall, when the yellow leaves of cottonwood trees are providing the drama.

Summer isn’t the best season for a Coyote Gulch Backpacking trip. The two biggest reasons are heat and flash floods. With temperatures regularly in the triple digits, even shade in the canyons can provide little relief from the heat. Late June to early September is also the monsoon season in the Southwest. During monsoon season flash floods can be frequent, and deadly when traveling in canyons. Sunny days are no guarantee of safety. Storms and heavy rain can occur many miles from a canyon. But eventually, all that water will come rushing down into the canyons. Never forget that canyons, especially slots, were formed by these floods.

Cliff Arch in Coyote Gulch, Glen Canyon National Recreation Area Utah #76201Cliff Arch Coyote Gulch  #76201  Purchase

Winter is also not the best season to visit Coyote Gulch. Temperatures can be cold to freezing, although doable. However, access roads can present a major problem. Nearly all unpaved roads in Southern Utah are impassable when wet. Even 4×4 vehicles can easily get stuck. The main access road to Coyote Gulch is Hole in the Rock Road. This gravel road is well maintained, although often covered with miles of bone-jarring washboards. However, side roads branching from it generally are not. If you go in winter, it is necessary to check with the local visitor center for road condition updates.

Routes into Coyote Gulch

There are four different entry and exit routes in Coyote Gulch. All four have their advantages and disadvantages. I’ll briefly describe them from north to south.

Dry Wash in Upper Coyote Gulch Grand Staircase-Escalante National Monument UtahUpper Coyote Gulch #75937

Red Well:

This entry will take you down the entire length of Coyote Gulch. To date, this is the route I took on my only Coyote Gulch backpacking trip. A round trip would be about 28 miles. I think this entry is interesting in that the gulch starts in a wide shallow, dry wash with low walls and little vegetation. Over the miles, it gradually transforms into a deep canyon with high walls, a running creek, and lush vegetatio

n. The upper reaches are less traveled,

and the vegetation can easily become a fatiguing bushwhacking trek.

The trailhead is 30 miles south on Hole in the Rock Road, then 1.5 miles down BLM 254. Parking is at the end of the road.

Hurricane Wash:

The entry point will bring you into the scenic heart of Coyote Gulch.  At around 27 miles roundtrip it is only slightly shorter than Red Wells. The advantage is that the less scenic upper parts are bypassed. The big disadvantage is that for the first several miles the route crosses over uninteresting open terrain with deep sand. On a hot sunny day, this section can be difficult.

The trailhead is 33 miles south on Hole in the Rock Road.

Red Well Trailhead into Coyote Gulch, Glen Canyon National Recreation Area UtahRed Well Trailhead Sign  #76354

The Sneak Route, or Jacob Hamblin Arch Water Tank Route:

This route provides the shortest access directly into and out of the most scenic area of the gulch. It has gained much popularity over the years, and some will say it is the best route. However, it is

not the easiest route for the inexperienced! The last short section is over a 200′ descent on a 45º Slickrock slope with significant exposure. And for all but the most experienced, or foolhardy, a climbing rope is necessary for a safe ascent or descent, especially with a heavy pack. Do your research and know your limitations before choosing this potentially dangerous route.

Go 36.25 miles south on Hole in the Rock Road. Turn left on Fortymile Ridge Road BLM 270, follow 4.5 miles, and park at the corral and water tanks.

Crack in the Wall:

This may be the most popular route into Coyote Gulch and probably will be the entry point for my next visit. It enters the gulch at its lower reaches, not far from the confluence with the Escalante River.  From here you can hike the entire length of the gulch and exit at Red Well. This entry also involves the longest drive to the trailhead, with the last four or five miles on rough Fortymile Ridge Road. After hiking about two miles the route descends into the gulch via a tight crack in a cliff. You’ll most likely need a rope to lower your pack separately down this section. There is a larger dune below the crack which may be strenuous to climb on the way out.

Go 36.25 miles south on Hole in the Rock Road. Turn left on Fortymile Ridge Road BLM 270, and follow 6.8 miles. The last two miles can be sandy.

Navigating in Coyote Gulch

While at its most basic navigating through the gulch is simply following the stream up or down through the canyon. However, in some sections like in the mid to upper reaches navigation can be more difficult. Less traveled parts have few obvious trails and can be a tangle of brush. And sometimes there are too many trails that try to follow the path of least resistance. While other areas can be confusing with side canyons that can lead to dead ends. A GPS may or may not be helpful if the signal is lost among the tall canyon walls. Topographic maps are helpful but some do not have enough detail to pick out the correct route. Coyote Gulch is one of the few areas where I was mostly relying on my route-finding instinct.

Giant sandstone alcove adjacent to Jacob Hamblin Arch, Glen Canyon National Recreation Area UtahGroup Camp in Coyote Gulch  #75969

Camping and Regulations in Coyote Gulch

The best places for camping in Coyote Gulch area are in the vicinity of Jacob Hamblin Arch, Coyote Natural Bridge, and near the Crack in the Wall. All of them are at or near the most scenic spots and have access to water in the creek or seeps from walls.

The most important thing to keep in mind when selecting a campsite is the potential for flooding. Look for established sites that are at least fifteen feet above the canyon floor. In addition, search the site for obvious signs of previous floodings, like debris wrapped around the base of trees.

    • Fires are not permitted anywhere in Coyote Gulch.
    • All human waste must be bagged and carried out. Restop2 bags are recommended
    • Food Storage. Small rodents are the problem here, they can peck through bags, packs, and tents. Hang food or better year use a bear canister.
    • Water is available from the stream but can be very silty. There are two natural springs, one near Jacob Hamblin Arch. Regardless if you use the spring or stream, treat or boil all water.
    • Permits are required for all overnight visits. They can be obtained at the trailhead or in the visitor center in the town of Escalante.
    • Pets are not permitted in Coyote Gulch, nor are any form of a pack animal.
    • Rangers regularly patrol the gulch so make sure you have your permit ready and are following all the rules.
    • Stop by the Escalante Interagency Visitor Center for current conditions, permits, maps, and waste disposal bags

Essential Tip:  Every year visitation is increasing dramatically, and rules and regulations can change every year or even season. Always check in advance for changes in regulations, permits, and road and trail conditions.

Backcountry camp with red tent in Coyote Gulch, Glen Canyon National Recreation Area UtahCoyote Gulch campsite  #76082

Safety during a Coyote Gulch Backpacking Trip

As mentioned earlier, flash flooding and heat are the main, but not the only, safety concerns while in Coyote Gulch. If you go in spring or fall these concerns will be at a minimum.

    • Flash Floods and rain. If you do get caught in heavy rain or flash flood situations, immediately move to higher ground. Be prepared to wait it out until water levels have dropped to a safe level.
    • Always check multiple weather forecasts before heading out to the trailhead. If conditions aren’t optimal choose another destination.
    • Quicksand. Yes, it does exist, but in my experience, it’s not like what you see in old Western TV shows and movies. You will encounter it mainly along streams in canyons, especially after a heavy rain, or flood. If you’re walking on a bank along a creek that suddenly quivers like jello and liquifies under your foot that’s quicksand. It’s easy enough to extract your foot if you’re alert and don’t proceed any further. If you get both feet in it you’ll have more trouble extracting yourself and you may lose a shoe. But you won’t slowly sink to your death like in the movies.
    • Make sure you have a full tank of gas and plenty of extra water before heading out to the trailhead.

Coyote Natural Bridge Coyote Gulch Glen Canyon National Recreation Area Utah #76235Coyote Natural Bridge  #76235  Purchase

Backpacking Gear Suggestions

Backpacking gear for Coyote Gulch is pretty similar to that for most other backpacking locations. The main difference would be footwear.

    • Footwear: You will be walking in and out of the water all day in Coyote Gulch. Trail runners, hiking shoes, neoprene river shoes, or cheap sneakers work best. Whatever you wear will take a serious beating between the constant wetting and abrasive sand and mud. Leather hiking boots are not a good choice.
    • Tent: Lightweight three-season tent or bivy. I use a Big Agnes Copper Spur HV UL2
    • Tent Liner: This will protect the bottom of your tent from abrasive sand. Don’t buy an expensive liner to match your tent. A thick plastic sheet costs pennies and will do the trick. I purchased a large sheet from a hardware store, and cut it to size. I’ve been using it for nearly 20 years!
    • Backpack: Well-fitting and large enough for all your gear. My preference is Osprey packs, they’re well-designed and well-made.
    • Sleeping bag: Unless it’s a mid-winter trip a bag rated to 30º or 40º is sufficient. My preference is Western Mountaineering down bags.
    • Sleeping Pad: I prefer a Therma-Rest inflatable pad. They are more comfortable, offer better insulation, and pack smaller than currently closed-cell foam pads.
    • Stove:  Fires are not permitted in Coyote Gulch, so a camp stove is essential. Bring whatever you have as long as it’s reliable. I recently switched over to an MSR Reactor Stove System and am extremely happy with its performance.
    • Water Purification: I boil all my water, the weight of extra fuel required to boil water with my Reactor stove is incredibly negligible. I’ve estimated the weight is less than that of a filtration pump. Online reviews report that UV Pens can be unreliable. I’ve also used filtration pumps and found them a pain to use and maintain, especially with very silty canyon water.
    • Headlamp: and batteries
    • Food: Whatever floats your boat. But make sure to bring some trail snacks or energy bars, and also pack a drink mix to replenish electrolytes. I think most powders sold in outdoor stores are way overpriced and taste horrible, so I stick with good old Gatorade.
    • Clothes: Lightweight quick-drying pants and T-shirts are best. Avoid cotton, it has little insulation when wet and dries slowly. My preference for baselayers and a pullover sweater is Merino wool. It’s very warm, lightweight, quick-drying, and also doesn’t smell as bad as synthetics after a few days. I also bring a light down jacket, and a rain shell if the weather is uncertain.
    • First aid kit
    • Maps and compass
    • Parachute cord 50′ in length, for hanging food or lowering packs
    • Hat
    • Bandana
    • Multi-tool

Essential Tip:  Whenever possible please support local outdoor recreation stores over big online retailers. For Coyote Gulch Escalante Outfitters is a good source for gear, current conditions, and dining.

Giant sandstone alcove adjacent to Jacob Hamblin Arch, Glen Canyon National Recreation Area Utah #76264Coyote Gulch Alcove #76264  Purchase

Photography Gear for a Coyote Gulch Backpacking Trip

What type of camera gear you bring depends of course on your goals. For small prints, blogs, and social media posts a smartphone or pocket camera may be sufficient.

Listed below is my standard kit while on a multi-day backpacking trip. It has been sufficient for all my needs in nearly every situation. The camera body and lenses in my kit are a little heavy, but the resulting image quality is what I require.

    • Nikon D850 with 3 extra fully charged batteries
    • Nikkor Lens:
      14-24mm 2.8G ED
      24-70mm 2.8E ED
      70-200mm 2.8E FL ED
    • Gitzo 1532 Tripod
    • Really Right Stuff B-55 Ball Head
    • B+H Polarizing Filter
    • Vello FWM-N2 Remote Shutter Release
    • Microfiber cleaning cloth
    • Lowe Pro 75 Toploader  camera case*

*I always carry my camera in a top-loading case with a chest harness. That way I don’t have to remove my backpack for a quick photo. In addition, this case has extra compartments and room for things like a map, snack, sunglasses, etc.

Steam flowing through canyon walls of Coyote Gulch, Glen Canyon National Recreation Area Utah #76250Coyote Gulch  #76250  Purchase

Leave No Trace

Please Please Please!  Don’t plan a trip to this or any other wilderness area unless you are prepared to strictly follow the guidelines of Leave No Trace (LNT). Coyote Gulch and all other wilderness areas throughout the world are under incredible pressure from growing amounts of visitors. Please do your part to help preserve these precious areas for future generations!

To learn more about the principles and practicing LNT please take a few minutes to visit the Leave No Trace Center for Outdoor Ethics. Your children and grandchildren will thank you!

Seven Leave No Trace Principles

    • Plan ahead and prepare.                                       
    • Travel and camp on durable surfaces.                 
    • Dispose of waste properly.                                                                         
    • Leave what you find.                                            
    • Minimize campfire impacts (be careful with fire).
    • Respect wildlife.  
    • Be considerate of other visitors.

Learn about how to protect the places we love to photograph
Visit the Nature First Website
Nature First the alliance for responsible nature photography


Giant sandstone alcove adjacent to Jacob Hamblin Arch, Glen Canyon National Recreation Area Utah #75967Coyote Gulch Alcove #75967  Purchase

For more tips on Backpacking Photography check out these posts:
Backpacking Photography Tips
Backpacking Photography Gear Tips

Thanks for reading, and feel free to share this post with your friends and colleagues!

Want to learn more, or have a professional photographer guide you in the field? Then take your Creative Photography to the next level with  Private Instruction and Guided Photo Tours.

All photos appearing in Coyote Gulch Backpacking and Photography are available for Commercial Licensing and Fine Art Prints. Click on any image to purchase, or contact me for more info!

Sunrise from Panorama Point, Capitol Reef National Park Utah

Southern Utah Travel Tips

Southern Utah Travel Tips

Sunrise from Panorama Point, Capitol Reef National Park UtahCapitol Reef National Park #75488  Purchase

*This post is a fairly long read

Have all my recent  Southwest Utah image additions inspired you to visit some of these locations? Are you thinking of just a leisurely vacation, or maybe a full-blown photography expedition? Well, read on, in this post I have some practical advice on how to make your trip more enjoyable and less stressful! And just as importantly how to responsibly visit these special places.

*Most of the tips in this post are for camping and adventure-oriented trips. Since I rarely stay at motels or lodges on my excursions I can’t offer reliable advice on them.

There are two things you must keep in mind when visiting Utah’s national parks and monuments.  The first is, THEY WILL BE CROWDED! Secondly, all those people are putting incredible stress on every aspect of the environment. From litter, vehicle air pollution, traffic jams, crowded trails, souvenir hunting, and even unsightly graffiti and vandalism, all our parks are under extreme pressure.

Zion Shuttle Bus at Court of the Patriarchs Zion National Park UtahZion National Park Shuttle Bus 

To meet these challenges the National Park Service, Forest Service, and many state parks now employ reservation systems, entrance quotas, and even lotteries to enter, camp, and hike in popular areas. Also, many parks are now on a shuttle bus-only system for getting around. Gone, perhaps forever, are the days when you can just arrive at a national park have your pick of a campsite, and drive your car to an uncrowded scenic vista at leisure.

Of course, there are still plenty of spectacular areas that are wide open for random camping and exploration and are also free from entry fees and reservations. Just keep in mind that many of those off-the-beaten-path destinations can be more difficult to get into, and out of. For these areas advanced research and planning are essential. Know your limitations before you head out!

Autumn sunset on The Watchman Zion National ParkZion National Park #76741  Purchase

Limit Your Southern Utah Destinations

Yes, the Golden or Grand Circle tour of national parks is a spectacular must-do trip for many. While on the road I’ve often overheard people talking about how they are doing the entire tour in five days, or less. To me that’s insane! With an itinerary like that you’re pretty much spending all your time driving from park to park every day with little time left to stop and actually enjoy the parks.

Limit your destinations to within the time you have available. Southern Utah has so much natural beauty to explore that it would be a crime to try and cram everything into one trip. Pick one or two destinations and set aside enough time to really enjoy them. You can always come back on another trip for new experiences.

Recreation.gov Love it or Hate it

There is no way around it, you will need to use Recreation.gov for reserving just about everything on your trip. It covers campsites, trail and climbing permits, lotteries, museum entrance fees, and lots more. Recreation.gov can make your trip less stressful, or incredibly stressful.

Many people including me see Recreation.gov as a monopoly akin to Ticketmaster for outdoor recreation. For one there mostly are no alternatives you can use for making reservations. Secondly, they charge service fees for all transactions which are often more than the actual fee for the activity. So planning a visit to Arches or Zion is now comparable to getting tickets for a popular concert.

Emerald green pools in The Subway, Left Fork North Creek, Zion National Park UtahA Lottery/Permit system is in place for the Subway hike in Zion #76842  Purchase

Recreation.gov is great if you plan every detail and day of your trip far in advance. With reservations in hand, you just show up at the park or campsite worry-free. But if you’re like me and you require flexibility in your itinerary then you’re in for a bit of a challenge. This is not only due to limited availability but also to accessing the Recreation.gov app. while on the road. Even with an excellent cell signal, the app can be excruciatingly slow. Of course, you can also call Recreation.gov directly but the wait can be frustratingly long to speak to an actual human. Also when you’re on the road there are often huge dead zones where you’ll be out of luck.

Essential Tip:   Always check out in advance the websites of the parks or monuments you plan to visit. Entrance fees and reservation policies are changing nearly every year. For example, in January 2020 Zion National Park implemented a lottery system for hiking the popular Angel’s Landing trail. Park websites will also prominently post any alerts to road and trail closures.

Sunrise view of Thor's Hammer and colorful hoodoos seen from below the canyon rim at Sunrise Point, Bryce Canyon National Park, UtahBryce Canyon National Park #76510 Purchase

BLM Options in Southern Utah

If your trip relies on camping and you’re out of luck in the reservation system don’t despair! The BLM (Bureau of Land Management) manages huge tracks of the desert southwest. Most BLM land offers free campgrounds and random camping. In fact, some of my favorite camping spots are on BLM land and are often my first choice. With good maps and instinct, you can often find a free campsite all to yourself in spectacular surroundings.

But just remember these spots are almost always primitive, with no water, restrooms or outhouses, picnic tables, or garbage receptacles. Always be prepared, and make sure you have plenty of water and a full tank of gas.

And don’t forget, if you can pack it in full you can pack it out empty!

Learn the Rules & Beat the Crowds in National Parks

You’ve made your reservations, arrived at the park, paid your entry fees, and set up camp. Now you are ready to have fun and explore. Great, but here are a few tips before you head out.

The first thing I do after arriving at a national park is to read the park newspaper and pay a visit to the visitors center. As I’ve mentioned many times already, all National Parks are in a constant state of change to keep up with the ever-increasing amount of visitors. You’ll need to get all the current information available regarding trail and road status, shuttle bus schedules, COVID policies, and more. It’s also a good idea to visit any interpretive exhibits to gain a better understanding of the park’s natural environment. You may also need further permits and reservations for certain trails and areas only available at the visitor center.

Sunrise at Towers of the Virgin Zion National Park UtahSunrise Zion National Park #76619  Purchase

The Early Bird and Late Bird Beats the Crowds!

To beat the crowds it’s a good idea to adopt the methods of professional photographers, get up early, really early.  You will definitely not regret this tip. The busiest times in any national park are between 10:a.m. and 5:00 p.m., give or take. Those hours are also the worst times of day to view wildlife.

If you want to enjoy that amazing scenic vista or trail and have it all to yourself then you need to be up and about before sunrise. I can’t tell you how many times I’ve been in a crowded park and enjoyed a gorgeous sunrise with hardly anyone else around. Several hours later the light will be all washed out. Plus you’ll be in a mosh pit of other gawking visitors.

This also, for the most part, goes for sunset. Most people are back in camp or town having dinner while the light warms up again for the evening show. My standard schedule is to be at my desired location at least an hour before sunrise or sunset. I’ll spend the middle part of the day scouting or relaxing before heading out again for sunset.

Essential Tip: If you’re planning on visiting several national Parks or Monuments over the course of a year then an annual America the Beautiful pass is a good investment. Most park entrance fees are in the $35 range, so you can save quite a bit on a Utah parks tour.

Best Times to Visit Southern Utah

This of course depends on the nature of your trip. I plan my trips for photographing seasonal events like fall colors or peak wildflower blooms. I need to be in specific areas within a specific time frame and have a flexible schedule. Others may simply want a leisurely sightseeing vacation. However, the parks will be very busy in whatever season you choose.

Devils Garden, Arches National Park, Utah #57917La Sal Mountains from Arches National Park #57917  Purchase

Spring in Southern Utah

This is one of the best seasons for visiting Utah’s Parks. In spring the temperatures are relatively mild and comfortable. Desert wildflowers are out and new green leaves on trees are a brilliant contrast to the red rock of the region. Also, in Arches and Canyonlands National Parks, the snow-covered La Sal Mountains provide a stunning backdrop. For these reasons, spring may also be eclipsing summer as the busiest time of year.

Spring comes early in the Southwest and I think March to mid-April is the best month to visit in the spring. February can still be pretty chilly, especially in the high altitudes of Bryce Canyon. And by the end of April, it’s already beginning to get uncomfortably hot.

Cottonwood trees in fall color Zion National Park UtahFall color Zion National Park #76599  Purchase

Fall in Southern Utah

My favorite time to visit Southern Utah is in the fall. Like spring the temperatures are mostly mild and the fall colors are spectacular. Fall is also one of the best seasons for canyoneering. The weather is much more settled, reducing the threat of flash flooding.

Fall comes late in the Southwest. Early to mid-October can still be quite warm, and color doesn’t reliably arrive until mid-to-late October. The best time to see fall colors in Zion National Park is during the first weeks of November. Of course, elevation plays a key role here. At higher elevations groves of aspens can be at their peak color in late September.

Sunset Arch, Grand Staircase-Escalante National Monument UtahGrand Staircase-Escalante National Monument  #76373  Purchase

Summer in Southern Utah

I would avoid a trip anywhere in the Southwest during summer. The heat is nearly always oppressive, and it can be deadly if your trip involves hiking or backpacking. Despite the heat, summer may be the only option for some, especially those with families. For this reason, this summer is usually the most crowded season in the Southwest.

Summer is also the monsoon season in the Southwest. Summer monsoon season is not recommended for those planning canyoneering trips. Slot canyons in particular are extremely hazardous this time of year. A calm sunny day is no guarantee of safe travel. Storms can form many miles away and dump huge quantities of rain in minutes. All that water creates deadly flash flooding in canyons, which of course is how they were formed in the first place.

Fresh dusting of snow on Red Canyon, Dixie National Forest UtahFresh snow in Red Canyon #32093  Purchase

Winter in Southern Utah 

This is rapidly becoming the new popular season among those desperate to escape the crowds. Some locations like Bryce Canyon, which sits at around 8000′, can be magical with a fresh dusting of snow on the red and orange hoodoos. Lower elevation areas can still be chilly but not uncomfortably cold.

Road conditions can be the biggest concern for a winter visitor. Main roads and highways are generally well maintained. However, it’s the unpaved gravel, dirt, and sand roads that are a problem. All of those roads turn into an inescapable quagmire after heavy rains. While the winter rains and snow are more moderate than the summer monsoons, there is not enough solar energy to dry them out enough for safe travel.

Halfway Hollow trailhead to Harris Wash and Zebra Slot Canyon, Grand Staircase-Escalante National Monument UtahTrailhead Grand Staircase-Escalante National Monument #75933  

Safely Visiting Southern Utah

Any trip to the desert Southwest can easily turn into a disaster. As the legendary polar explorer Roald Amundsen once wisely said:

“Adventure is just bad planning*”

*Unlike today back then the definition of adventure was not synonymous with fun, e.g. the Donner Party had an epic adventure.

Although you’re unlikely to fall into a glacial crevasse or die in a blizzard, there are some serious life-threatening conditions to be aware of. The tips offered below are fairly basic starting points to get you thinking. They are not all-inclusive of hazards you need to be aware of on a trip to the desert.

Water: Always, always carry water, everywhere you go. It’s frightening how easy it is to get quickly dehydrated in the desert. I carry a hard-sided 7-gallon water in my vehicle and top it off every chance I get. On hikes, I carry a 3-liter hydration reservoir in my pack filled with a sports drink.

Buckskin Gulch Paria Canyon-Vermilion Cliffs Wilderness ArizonaFlash flood debris high in slot canyon #37342 

Weather: To ensure a safe and enjoyable trip careful weather monitoring is essential. This is especially true when hiking in any slot canyon or dry wash. Flash floods can occur from storms many miles away. Just like filling up on water and gas before you head out to a remote spot you should load up on several weather forecasts.

Sun:  Even on a mild spring or fall day the sun can feel burning hot. Unless you’re hiking in a deep canyon with tall walls it can be difficult to find shade. Always carry and use plenty of good sunscreens. Heat and sunstroke are serious issues that can come on very quickly in the desert. Know the warning signs and immediately get in the shade and drink plenty of fluids if you or your companions are in danger.

Coyote Gulch BackpackerThe author after a tussle with mud and quicksand in Coyote Gulch #76355

Quicksand: Yes it does exist, but in my experience, it’s not like what you see in old western tv shows and movies. You will encounter it mainly along streams in canyons, especially after heavy rain. If you’re walking on a bank along a creek that suddenly quivers like jello and liquefies under your foot that’s quicksand. It’s easy enough to extract your foot if you’re alert and don’t proceed any further. If you get both feet in it you’ll have more trouble extracting yourself and may lose a shoe. But you won’t slowly sink to your death like in the movies.

Essential Tip:  Always know your limits, do your research, and don’t get in over your head. Online trip reports can easily mislead you, The experience level of whoever wrote the report can be very different from your own. I’ve read some trip reports promoting the Sneak Route into Coyote Gulch as an easy alternate entry point. In reality, it is close to a technical canyoneering route with a great deal of exposure, and it usually needs ropes for a safe entry and exit.

Utah State Route 95 in Glen Canyon National Recreation Area UtahUtah State Highway 95  #74968  Purchase

Cell Signals in Southern Utah:

It should be obvious, but don’t depend on being able to get a good cell phone signal in Southern Utah. There are huge dead zone areas, especially in Grand Staircase-Escalante National Monument and Glen Canyon Recreation Area. Mountains, buttes, and canyon walls can easily cut you off from a signal. Even in some small towns and national parks the signal can be spotty.

Unpaved Roads in Southern Utah

As I mentioned above unpaved roads can easily become a trap for you and your vehicle. Nearly all dirt roads are completely impassable after rain and during winter. When wet these roads become a gooey mess of mud that even a monster 4×4 would have difficulty getting out of. Even a small puddle in an otherwise dry dirt road can get you stuck.

Some roads cross deep sand which can trap all but 4x4s and some cross very rough sections of slickrock. Even some of the best-maintained gravel roads can be challenging. Hole in the Rock Road, a wide heavily traveled road south of Escalante, is routinely covered in bone-jarring washboards. After I drove over 20 miles of washboard on this road I thought my truck would fall to pieces when I stopped.

Moki Dugway Bears Ears National MonumentMoki Dugway, some roads have steep unguarded drop-offs #74769

Essential Tip:  This should be common sense but if there is a road sign that states “4×4 vehicles only” it means it! Getting a tow truck out to a remote area can cost hundreds if not thousands of dollars, assuming you can find a ride back into town to get one!

Hiking in Southern Utah with Maps and GPS

I’m not a big fan of GPS devices, I don’t use them and have always relied on physical maps on hikes. When hiking in some complex canyons such as those in the Escalante drainage it is extremely important to not completely rely on maps or GPS. While both can be important navigation aids you will be using your navigation skills and common sense to find the correct route.

Cairn on trail in The Needles, Canyonlands National Park UtahCairn marking route on trail Canyonlands National Park  #74696

Many of these areas can be a maze of side canyons obscured by thick vegetation, losing the correct route is much easier than you may think. Even the most detailed maps and GPS may not contain the info needed to make a wise choice in navigating them. The tall narrow walls of some canyons can also block out a good signal for your GPS. Also, trails in canyons marked on a map or in a guidebook can be nonexistent by the time of your visit. A well-marked easy-to-follow trail can disappear overnight in a flood.

Essential Tip:   In some areas, small rock cairns are necessary to mark the correct route. Do not remove them. And don’t add additional decorative cairns.

Essential Tip:  Before heading out to a remote area pay a visit to the nearest ranger station for the latest weather report and current info on road and trail conditions. You can also check in with the local outdoor store or guide service for a second opinion. These folks live work and play in the area and could offer valuable info not available elsewhere.
* However it’s been my experience that the young clerk at the local gas station doesn’t have a clue to offer.

Leave No Trace, Physical  Digital & Archeological

I’ve been adding this topic to the end of many of my posts. However, in light of my recent firsthand experience, I’m bumping it up and expanding it. In addition to traditional LNT, I want to talk about Digital LNT and Archeological LNT here.

If you’ve never come across this term you definitely will on your next SW trip. Its most basic definition means to take only pictures, and leave only footprints. Sounds like common sense and common courtesy to the environment and future visitors right? In the Desert Southwest, the leave only footprints part has an important twist to it.

Cryptobiotic SoilCryptobiotic Soil  #74929 

Cryptobiotic Soil:

If you haven’t heard of LNT then you probably haven’t heard of Cryptobiotic Soil. In the desert, this crusty popcorn-like soil is everywhere. It is the key to preventing the desert from being blown away into oblivion by wind and washed away by rain. The term relates to the thin crust of soil held together by fungi, lichens, cyanobacteria, and more. Undisturbed on its own it prevents the loose soil and sand beneath it from being eroded. It’s this soil that also gives plants a foothold in a tough environment.

This soil is incredibly fragile and can be destroyed by the slightest footprint. Regeneration can take decades under optimum conditions. So stay on the trail and don’t be a Crust Buster. If you absolutely must leave the trail where this soil is present then walk on durable surfaces like stones or slickrock.

To learn more about the principles and practicing LNT please take a few minutes to visit the Leave No Trace Center for Outdoor Ethics. Your children and grandchildren will thank you!

Seven Leave No Trace Principles

    • Plan ahead and prepare.                                       
    • Travel and camp on durable surfaces.                 
    • Dispose of waste properly.                                                                         
    • Leave what you find.                                            
    • Minimize campfire impacts (be careful with fire).
    • Respect wildlife.  
    • Be considerate of other visitors.

House on Fire Ruins Mule Canyon Cedar Mesa Bears Ears National Mounument UtahRuins in Bears Ears National Monument #74879  Purchase 

LNT for Archeological Sites:

The Southwest is home to many fascinating archeological sites that are both historically important and culturally sacred. It is awe-inspiring to see these sites in person, and it’s extremely important to make sure they remain intact for future generations. Learn more about them at the Bears Ears Education Center

    • Leave All Artifacts in Their Place
    • Don’t Disturb Fossils or Bones
    • Don’t Touch Rock Art or Add Your Own
    • Stay Off Walls and Structures
    • Dogs and Archeology Don’t Mix
    • Camp & eat Away From Archeology
    • Avoid Building Cairns
    • Don’t Reveal GPS Info

Giant sandstone alcove adjacent to Jacob Hamblin Arch, Glen Canyon National Recreation Area Utah #76264Glen Canyon National Recreation Area #76264 Purchase

Digital Leave No Trace

While the principles of LNT are pretty easy to understand and practice, DLNT is more difficult to implement for some. The basic idea is in response to the onslaught of crowds, resulting from everyone posting pictures on social media of locations from their latest trip. DLNT offers some guidelines to help moderate this trend, or at least make people a bit more aware of their actions.

For me, this is a tough one to deal with. I am painfully aware that I’m part of the problem. I have been wrestling with my response for quite some time. Since my livelihood is landscape and nature photography it’s just not that simple for me to stop posting pictures and writing posts like this. If I stop marketing my photography then eventually my family and I are living on the street.

So what to do? At the very least I will be vaguer when applying captions and titles to social media posts. For example, the above photo was captioned Glen Canyon National Recreation Area, which is a huge area of complex canyons. Using just this caption info you’ll probably never be able to identify the location where the photo was made. However, a determined reader would probably find a few clues as to where it is both from this post and elsewhere online.

Below are some digital leave-no-trace guidelines offered by the folks at Leave No Trace. I encourage you to click the link to learn more about the guidelines below.

    • Think Before You Geotag
    • Be Mindful of What Your Image Portrays
    • Encourage and Inspire Leave No Trace on Social Media Posts
    • Give Back to Places You Love
    • Shaming is Not the Answer

Learn about how to protect the places we love to photograph
Visit the Nature First Website
Nature First the alliance for responsible nature photography


Owachomo Bridge Natural Bridges National Monument UtahNatural Bridges National Monument #74920 Purchase

Next Up: Southern Utah Photography Tips

Thanks for reading, feel free to share this post with your friends and colleagues!

Want to learn more, or have a professional photographer guide you in the field? Then take your Creative Photography to the next level with  Private Instruction and Guided Photo Tours.

All photos appearing in Southern Utah Travel Tips are available for Commercial Licensing and Fine Art Prints. Click on any image to purchase, or contact me for more info!

Southern Utah Travel Tips

Squaretop Mountain Wind River Range Wyoming

Rocky Mountains Photography Tour

Rocky Mountains Photography Tour

Backpacker on Titcomb Basin Trail Wind River Range Rocky Mountains WyomingBackpacking Wind River Range #66803

Update 8/162021: Due to wildfires and heavy smoke and haze, this trip has been delayed.

This summer’s Rocky Mountains Photography Tour will start on July 9. I was once again hoping to head north to Alaska and the Yukon Territory. But since it looks like the border won’t be open in time, it is on to Plan B. So this year I’ll be revisiting some locations from 2019 and 2020.

These locations will mainly the Boulder-White Clouds Wilderness in Idaho, and the Wind River Range of Wyoming. I’m also planning a lengthy backpacking trip to the Chinese Wall in the Bob Marshall Wilderness of Montana. That location was on my itinerary last year but I swapped it out for Glacier National Park instead.

White Clouds Wilderness Rocky Mountains IdahoBoulder White-Clouds Wilderness  #68945  Purchase

Boulder-White Clouds Wilderness Idaho

On last summer’s visit to the White-Clouds I was only able to visit the north section. This year I’ll be backpacking in to the south half to photograph the Boulder Chain Lakes Basin and the some of the highest peaks in the wilderness. This area is also part of the popular White Clouds Wilderness Loop. For my purposes though I will be doing an out and back trip instead of the loop. I’ll also have plenty of time budgeted for layovers at the best locations along the route.

Squaretop Mountain Wind River Range WyomingSquaretop Mountain Wind River Range #66997 Purchase

Wind River Range Wyoming

Ah, what can I say about the Winds? This will be my seventh trip there and I still can’t get enough of this spectacular mountain range. It’s a backpackers’ dream. Thousands of lakes, 40 peaks over 13,000′, miles and miles of trails in the subalpine along the Continental Divide, plus easy cross country travel to boot!

This year my plans will include parts of the Hailey Pass-Washakie Pass Loop, Desolation Valley, and Baptiste Lake. Also on the itinerary will be a return to Cirque of the Towers and Deep Lake. I’ll also be returning to the Green Lakes area for more new photos of the Green River and Squaretop Mountain.

Castle Reef Mountain Sun Canyon Rocky Mountains MontanaCastle Reef Mountain Montana  #68136  Purchase

Bob Marshall Wilderness Montana

Known among locals and avid backpackers as “The Bob”, this wilderness destination in the northern Rocky Mountains has been on my must photograph list for decades. The Bob Marshall Wilderness Complex is a huge swath of land straddling both sides of the Continental Divide. An important part of the Greater Yellowstone Ecosystem it is home to the largest intact population of Grizzlies in the lower 48.

Last year It was on my itinerary but I took a pass due to an unusual opportunity to obtain backcountry permits in Glacier National Park. The destination on this trip will be a multi-day backpack to the famous Chinese Wall. This is arguably the signature feature of the Bob Marshall Wilderness, a 12 mile long 1000′ high limestone escarpment on the Continental Divide.

U.S. Highway 93 Lost River Range IdahoU.S. 93 Idaho #68984  Purchase

A Flexible Itinerary

For an ambitious trip like this several caveats need to be mentioned. First of all if it becomes clear the Canada border will open before the end of July it will be back to Plan A, as in A for Alaska.

Secondly, as with all of my trips that include multiple long backpacking excursions, some locations may be modified due to weather or time constraints. There are already indications of a major wildfire season in the making, so smoky conditions or closed off areas may change my plans.

Finally, if you are in any of these areas in July or August and would like to meet up in the wilderness, or in town for a coffee or beer, feel free to contact me!

If you enjoyed reading Rocky Mountains Photography Tour please share it with your friends, colleagues and family.

Photos appearing in Rocky Mountains Photography Tour are available for Commercial Licensing and Fine Art Prints. Click on any image to purchase, or contact me for more info!

Rocky Mountains Photography Tour

Meadows of Broadleaf Arnica (Arnica latifolia) at Boulder Pass, Glacier National Park Montana

Boulder Pass Glacier National Park Part 2

Boulder Pass Glacier National Park Part 2

Meadows of Broadleaf Arnica (Arnica latifolia) at Boulder PassBoulder Pass Glacier National Park #69880  Purchase

Read: Boulder Pass Glacier National Park Part 1 here

Glacier National Park is truly one of the great gems in the national park system. It has many attributes which set it apart from other parks. In addition to being a national park, it is also a biosphere reserve, world heritage site, and international peace park.  It is the home of one of the last strongholds of grizzly bears in the lower 48. And although it contains two dozen named glaciers, the park’s name reflects the sculpting of its terrain by ice age glaciation.

All of this and more attracts visitors from around the world, to the tune of 3,000,000 visitors a year, on average. The reasons visitors flock to the park are as diverse as the park’s features. Some come to marvel at the beauty of the mountains. Some hope to see wildlife close up. Others come solely to escape the crushing pressures of modern-day society. Unfortunately, the latter have little chance of doing so when touring the park by car.

Others like me come to the park to photograph the dramatic landscape of the northern Rocky Mountains. As I mentioned in my previous post, I’ve been to Glacier many times over the years and photographed it in all seasons. Nearly all of those trips were to iconic front-country locations. But last summer I took the opportunity to visit a remote and special corner of Glacier National Park, Kintla Lake, and Boulder Pass.

First Day Along Kintla Lake

The remoteness of Kintla Lake and Boulder Pass in the northeast corner of the park looked appealing to me. It was a long hike and passed through areas with lots of photographic potential. But first I needed a wilderness permit, and it took me a couple of tries to obtain one. Even though it was August the park service just opened campsites at the pass the day before. So I was one of the first to stay there that season.

Kinnerly Peak Kintla Lake. Glacier National Park MontanaKinnerly Peak Kintla Lake  #69835  Purchase

The hike begins at Kintla Lake and reaches Boulder Pass 17.5 miles later, with about 3200′ of elevation gain along the way. Some hardcore long-distance hikers can make the trip in one day, but nearly everyone splits it in two. It’s also possible to continue down Boulder Pas, down to Waterton Lake, and exit the eastern side of the park. A popular loop trip would begin at Kintla Lake and exit at Bowman Lake, or vice versa. My plan was to simply do an out and back on the same route.

The first day was a pretty easy hike along Kintla Lake to Kintla Head camp. It’s a pleasant hike mostly through the forest with a few views of the lake along the way. The first day or two on a long hike is sometimes the hardest since your pack is full of food and fuel. At camp, it was a pleasure to sit around the food prep area with other hikers and swap stories and backgrounds. I usually travel solo so chatting it up with others is a welcome treat.

Kintla and Kinnerly Peaks Glacier National Park MontanaKintla Peak Glacier National Park #70050  Purchase

Kintla Lake to Boulder Pass Glacier National Park

The hard work would come the next day. It was another 11 miles to Boulder Pass camp, with nearly all of the 3200′ of elevation coming in the last miles. I got an early start to beat the heat and travel at a leisurely pace. Just past the head of Upper Kintla Lake, the work began. The trail wasn’t too steep or difficult, just a long constant uphill slog. At one point the trail passes through about a mile of thick shoulder-high brush. Often it was so thick it was hard to see the trail or rocks and roots.

It seems to take forever to reach the point where signs of the subalpine begin. And although the view across the valley to Kintla Glacier is rewarding it’s difficult to tell where the trail tops out at the pass. It was when I was just below the pass that I saw my first grizzly in the backcountry.

I’ve been backpacking for 40 years and this is my first bear encounter, go figure. The bear was a sow with two cubs about 25 yards uphill of the trail. Since I was following the book and making plenty of noise she saw me and slowly moved away. But proceeding further would have brought me closer to the next switchback. So I waited and continued to talk loudly. The bear eventually moved on and I continued up to the pass. A couple of passing hikers, who apparently felt close bear encounters weren’t anything to worry about, lightheartedly kidded me for talking so loudly to ward off the bear.

Wildflower meadows at sunset. Boulder Pass, Glacier National Park MontanaBoulder Pass Wildflowers  #69886  Purchase

At Boulder Pass Glacier National Park

Finally, the trail reached the pass with all its glorious views. At this point, an oddity struck me. Everywhere you go in Glacier Park you’re passing by or walking over colorful layers of sedimentary rock. However, at Boulder Pass, I was walking over a vast expanse of ancient lava.

Afterward, I did some geology research and found out that it was Purcell Lava.  Long ago when the area was still beneath an ancient sea molten rock squeezed up from below and flowed onto the sediment forming rocks. It was also interesting to see that this lava exposed at the pass was smooth and bore striations from past glacial activity.

Meadows of Broadleaf Arnica (Arnica latifolia) at Boulder PassThunderbird Mountain from Boulder Pass   #69907  Purchase

The Boulder Pass camp has three tent sites, a food prep area with hanging poles, an outhouse, and one very aggressive marmot. I’ve never come across a marmot that was so intent on obtaining food or salt from sweaty backpack straps. You have to be on guard since marmots can easily chew through straps, shoelaces, and other important items in search of nutrients and food. This guy had the appearance of having seen quite a few winters and fortunately eventually gave up on his pursuits.

I had three days to explore and photograph the area, and after a bite to eat I was eager to get to work. It turns out that Boulder Pass is a pretty big area with a few adjacent benches and basins below Boulder Peak. There was everything from lush meadows, streams, and tarns, to glacial moraines and debris. Plenty of subject matter to keep me busy.

Meadows of red paintbrush wildflowers at Boulder Pass. Glacier National ParkWildflowers at Boulder Pass  #69947  Purchase

Hello Bear

After some exploring, it was getting towards golden hour in the evening. The best option was to go back to the meadows teeming with wildflowers. The compositions I wanted meant shooting very low to the ground with an ultra-wide-angle lens.  With the setting sun shining through the trees and colors glowing all the elements were coming together. I was absorbed in photographing the moment.

It was then I heard a noise and looked up from the camera to see a large grizzly bear. It was just rounding a corner and coming up the trail about 50′ away. We both saw each other at the same time and the bear jumped back a bit in surprise. Very slowly I stood up while at the same time reaching for my bear spray. At this point, I remembered the sow and cubs from earlier in the day. I carefully looked behind me to see if I was in the unfortunate position of being between a mother and her cubs. There was no sign of them so perhaps this was a different bear.

Meadows of purple aster wildflowers at Boulder Pass. Glacier National ParkWildflowers at Boulder Pass  #69970  Purchase

After a few seconds, which seemed much longer, the bear slowly moved away downslope while watching me. Then it turned its head and bolted away. This was about as close as I ever would want to get to a grizzly. I can’t say I was terrified, but I was nervous and very conscious about keeping my wits and not making a wrong move. After a while, I went back to photographing my composition.

I’ve since told this story many times and have always gotten the same question. Did you get a picture of the bear? No, I didn’t, at the time photographing the bear was the last thing on my mind.

Exposed section of trail between Brown Pass and Hole in the Wall. Glacier National Park MontanaHole In The Wall Trail  #69893  Purchase

Hole In The Wall Boulder Peak

At the east end of Boulder Pass, the trail descends into the large horseshoe basin of Hole In The Wall. From there it continues to Browns Pass and Waterton Lake, or Bowman Lake. Day hiking on Hole In The Wall looked inviting but there was still a lot to investigate at Boulder Pass.

One area, in particular, was a series of benches on the west side of Boulder Peak. The views from there looking down to Pocket Lake and out to Kintla and Kinnerly Peaks were fabulous. In addition, some wispy clouds were moving in which could make for a great sunset. Since this was my last day at the pass, and it was mostly blue sky days while there, this seemed like the best chance to get some good photos.

Rainbow Peak Glacier National ParkRainbow Mountain from Boulder Pass  #69907  Purchase

Another thing that I noticed just below the west side of Boulder Pass was the presence of Subalpine Larches. These are a special type of conifer which in the fall their needles turn brilliant gold and fall off. In all my years of looking at photos of Glacier Park, I never saw any pictures of these trees in fall. So it was surprising to see them. Of course, this means that a trip to Boulder Pass in late September would be well worth it.

The next day I hiked back down to the Camp at Upper Kintla Lake. The lake was pleasant and scenic but nothing like the dramatic scenery up at the pass. The following day was the long hike out to complete the trip. It was a sweet feeling to have finally made such a wonderful trip to a new section of the park. It was also a bit sad when reflecting on when or if I’ll ever return.

Upper Kintla Lake Glacier National Park MontanaUpper Kintla Lake  #70062  Purchase


If You Go to Boulder Pass Glacier National Park

Distance from Kintla Lake Trailhead to Boulder Pass:  17.5 miles
Elevation Gain:  ~3200
Difficulty:  Moderate
Red Tape:  National Park Entrance Fee, Backcountry Wilderness Permits

The Kintla Lake Trailhead is located about 40 miles north of the West Entrance on the North Fork Road. The last 10 or so miles are on a gravel road which can be very dusty and bumpy. There is a hiker’s parking area 1/4 from the lake. There is also a small campground at the lake.

The  West Entrance and Apgar area has many services including gas, groceries, dining, and a very large campground. If you have the time it’s a great place to stay for a day or two before or after your hike.

Food bags hanging for bear safety at food prep area of Kintla Lake Campsite Glacier National Park MontanaKintla Head camp food prep area #69827

Bear Safety in Glacier National Park

All backpackers are required to carry bear spray. Bear canisters are not required as of this writing, as all backcountry camp areas have food prep areas with poles for hanging food. Make sure to bring about 50′ of parachute cord or similar to hang your food. When getting your permit you’ll also need to watch a short video on bear safety. Don’t take this lightly, as you’ve seen in this post there is a good chance of seeing bears on the trail or near campsites.

Sunset over Kinnerly and Long Knife Peaks seen from Boulder Peak. Glacier National Park MontanaSunset Boulder Pass Glacier National Park  #70041  Purchase

Leave No Trace

Please Please Please!  Don’t plan a trip to this or any other wilderness area unless you are prepared to strictly follow the guidelines of Leave No Trace (LNT). Glacier Park and all other wilderness areas throughout the world are under incredible pressure from growing amounts of visitors. Please do your part to help preserve these precious areas for future generations!

To learn more about the principles and practicing LNT please take a few minutes to visit the Leave No Trace Center for Outdoor Ethics. Your children and grandchildren will thank you!

Seven Leave No Trace Principles

  • Plan ahead and prepare.                                       
  • Travel and camp on durable surfaces.                 
  • Dispose of waste properly.                                                                         
  • Leave what you find.                                            
  • Minimize campfire impacts (be careful with fire).
  • Respect wildlife.  
  • Be considerate of other visitors.

Hoary Marmot (Marmota caligata) Glacier National ParkMarmot at Boulder Pass Glacier National Park  #69980  Purchase

Photo Gear Used On This Trip

Nikon D850
Nikkor Lens:
14-24mm 2.8G ED
24-70mm 2.8E ED
70-200mm 2.8E FL ED
Gitzo 1532 Tripod
Really Right Stuff B-55 Ball Head
Assorted Lee Graduated Neutral Density Filters
B+H Polarizing Filter
Vello FWM-N2 Remote Shutter Release

If you enjoyed reading Boulder pass Glacier National Park please share it with your friends and family. And make sure you check out Boulder Pass Glacier National Park Part 1

Photos appearing in Boulder Pass Glacier National Park  are available for Commercial Licensing and Fine Art Prints. Click on any image to purchase, or contact me for more info!

Boulder Pass Glacier National Park

Sunrise at Lake McDonald Glacier National Park Montana

Boulder Pass Glacier National Park Part 1

Boulder Pass Glacier National Park

Sunrise at Lake McDonald Glacier National Park MontanaLake McDonald Glacier National Park #69738  Purchase

Glacier National Park is one of the most popular national parks in the country. It averages around 3,000,000 visitors a year. That’s a lot of people, and you would be correct in thinking the park has an overwhelming amount of visitors. However, like most popular national parks, nearly all of those visitors only experience the park along front country roads and its iconic attractions. In Glacier, the vast majority of visitors only travel along Going-to-the-Sun Road and stay only for a day. If they get out of their car to experience the park it is most likely at Logan Pass.

Indeed, on any given summer day the line of traffic on Going-to-the-Sun Road begins well before dawn. The parking lot at Logan Pass usually fills to capacity by 9 am. Soon after that, there is traffic congestion similar to that in any big city, and most scenic pullouts have no open parking spaces left. Those that want a more in-depth experience often choose day hikes beginning with Going to the Sun Road. And a smaller percentage explore trails in other sections of the park. The smallest percentage of visitors choose overnight backpacks to more well-known backcountry destinations.

It would seem that there is no corner of Glacier National Park free from crowds. This would be true if the park service didn’t have a strict permit system in place that limits backcountry campsites. This system is necessary to preserve the wilderness experience, and also protect fragile environments and wildlife. The visitor wanting to spend a night or two in the backcountry must negotiate the online permit reservation system. This can be very frustrating as nearly all sites fill up many months in advance. Some sites can even be closed and reservations canceled at the last minute due to bear activity.

Wilderness Permit Line Glacier National ParkWilderness permit line Glacier National Park

Obtaining a Permit for Boulder Pass

All this changed last summer. Because of the COVID pandemic, Glacier was operating the permit system on an in-person first-come basis only. So I saw this as a chance to improve my odds of doing a multi-day backpacking and photography trip into one of the most beautiful and remote areas of the park. Nearly all photographers gravitate to several well-known places in the park, such as Logan Pass, Lake McDonald. But my plan was to photograph in Kintla Lake and at Boulder Pass, a relatively unknown area for photographers.

So with time on my side, I set about obtaining a permit for a six-day trip. Accommodations in Glacier during the summer months are difficult to come by in a normal year. But last summer I had to work even harder to find a place, resorting to some obscure places I’ve found over the years. Fortunately, I found a place outside the park only minutes away from the wilderness permit office.

It still wasn’t easy to get my permits though. The line for permits was long and people began arriving well before dawn. On my first attempt I got there around 6 am and there were already at least 40 people in front of me. After waiting a couple of hours I heard that my chosen sites were already filled. So the next day I set my alarm for 1:30 am. Upon arriving at the office I was relieved to see there were only four others already in line. With a camp chair and my sleeping bag, I got comfortable until the office opened at 9. The waiting paid off and I left with a permit for my desired sites and dates in hand.

Couple on dock at Sunrise at Lake McDonald Glacier National Park MontanaSunrise proposal on Lake McDonald Glacier National Park #69805

Extra Time in Glacier Park

After obtaining my permit for Boulder Pass, I still had a couple of days to wait to start my trip. With time to kill there was no lack of ways to use it. Every morning and evening since arriving I set up to photograph at Lake McDonald. During my stay there were several very nice instances of light, making the efforts worthwhile.

One morning after arriving at the lake before dawn there was a couple on the nearby boat dock. I didn’t pay much attention to them until I saw the man drop to one knee. It was then apparent he was proposing marriage. He certainly chose the right day and time since the sky was ablaze with color at dawn.

On another occasion, I was sitting on the beach in the evening. A couple showed up that apparently were just married since the woman was wearing her wedding gown. They were there for some post-wedding portrait photographs. I wonder how many such events take place here during the year?

During this free time, there was also the opportunity to get in a day hike or two. After a quick look at the park map, one hike, in particular, rose above the rest, Sperry Chalet and Comeau Pass.

Sperry Chalet, Glacier National ParkSperry Chalet Glacier National Park  #69749

Sperry Chalet

A few years back the historic Sperry Chalet burned in the Sprague Fire. It was since rebuilt and this summer it was again open for business. Further up the trail from the chalet is Comeau Pass with an overlook of the Sperry Glacier. Together they offered a chance for me to see a new area of the park while getting a good workout.

The hike begins at the trailhead across the road from Lake McDonald Lodge. There is a huge parking area and it too overflows with cars by noon, so I got there early in the morning. The hike to Comeau Pass and back is around 17 miles with a nearly 5000′ in elevation gain. This is definitely a full-day leg burner unless you’re a trail runner who does this kind of thing before breakfast.

Sperry Chalet cookhouse entrance during Covid 19 Pandemic, Glacier National ParkSperry Chalet Dining Hall  #69752

If you make it all the way you’ll be rewarded with spectacular views at an elevation 1500′ higher than those at Logan Pass. Most hikers on this trail however are happy to get as far as Sperry Chalet, about 12 miles round trip with 3600′ elevation gain. The chalet sits right at the tree line, and the views down the valley are great, but the best scenery lies further up.

The chalet can be described as rustic elegance. Although during the pandemic only registered guests were allowed inside I was able to peak in the windows. There was a classic western lodge or cabin look to the rooms. The chalet has no electricity but there were oil lamps in the rooms, adding to the charm. There is a separate building for dining, looking in the door the aroma of freshly baked cinnamon rolls was wafting out. Sadly again only guests could enter this summer.

View from Comeau Pass, Glacier National Park MontanaComeau Pass Glacier National Park #69770

Comeau Pass

From the Chalet, the trail passes numerous waterfalls, wildflowers, interesting rock layers, and two alpine lakes. Finally, as you get closer to the pass it appears the trail dead-ends at the base of a cliff. However, when you get there a steep narrow stairway cut into the cliff awaits you. Something any fan of Lord of the Rings will enjoy. It’s kind of a short tame version of the Stair of Cirith Ungol, but there aren’t any giant spiders or Dark Tower on the other side. There are cables to assist in ascending and descending. On my hike the stairs acted like a wind tunnel gone nuts, it would have been difficult to get down safely without them.

Stairs cut in rock at final segment to Comeau Pass trail Glacier National ParkComeau Pass Stairway Glacier National Park #69777

Wildlife is another perk of this hike. On the way up to the pass, a herd of mountain goats blocked my way. They took a while to move on so I played wildlife photographer for a few minutes. On the way down a passing hiker alerted me to a grizzly sow and two cubs not far from the trail. I saw them from a good distance and was happy they weren’t closer.

Mountain Goats (Oreamnos americanus) on Comeau Pass Trail, Glacier National Park MontanaMountain Goats Comeau Pass Trail  #69757

Even though I was already on several lengthy backpacking trips in the past month the last few miles back from this one was slow and tiring. It was nice to get back to camp relax and recoup before starting my six-day trip to Boulder Pass.

Click here to read part two of Boulder Pass Glacier National Park

Canoeist paddling on Lake McDonald at sunrise. Glacier National Park MontanaLake McDonald Glacier National Park #69818 Purchase

If you enjoyed reading Boulder Pass Glacier National Park please share it with your friends and family. Next up Boulder Pass Glacier National Park Part 2!

Photos appearing in Boulder Pass Glacier National Park are available for Commercial Licensing and Fine Art Prints. Click on any image to purchase, or contact me for more info!

Boulder Pass Glacier National Park

Pronghorn and Dragon Head Peaks reflected in pond near Lee Lake, Bridger Wilderness. Wind River Range, Wyoming

Central Wind River Range Backpacking

Central Wind River Range Backpacking

Pronghorn and Dragon Head Peaks reflected in pond near Lee Lake, Bridger Wilderness. Wind River Range, WyomingPronghorn and Dragon Head Peaks, Central Wind River Range  #69141  Purchase

The Wind River Range of Wyoming is a spectacular section of the Rocky Mountains. It contains 40 peaks over 13,000 feet, the largest glacier in the American Rockies, and over 1300 named lakes. All are spread over three wilderness areas.  While not as well known as other destinations such as Grand Teton and Glacier National Parks, the range nonetheless attracts an increasing number of backpackers, climbers, hunters, and fishermen.

While popular destinations in the Winds like Cirque of the Towers, Island Lake,  and Titcomb Basin see the bulk of the crowds, much of the Winds remain nearly deserted. An extensive network of trails gives access to nearly every corner of the range, and off-trail travel is relatively straightforward. All of this offers outdoor enthusiasts a lifetime of wilderness adventures.

Island Lake and Fremont Peak, Bridger Wilderness, Wind River Range WyomingIsland Lake Wind River Range #66386  Purchase

My first visit to the Winds was in 2002, and I’ve been coming back for more ever since. Being a landscape photographer, I was naturally drawn to Titcomb Basin and Cirque of the Towers on initial trips. But over time, I became aware of other hidden gems in the range. Soon, my list of destinations grew long with several spots rising to the top.

Last summer, I returned to the Winds to check out a new area, Lee Lake and Pronghorn Peak. Both are located in the upper valley of the Middle Fork of Boulder Creek. This location, in the Central Wind Rivers, was on my list the previous summer but was nixed in favor of another location. When doing location research over the years, one peak’s stunning profile stood out. This was Pronghorn Peak. Rising to 12,388′, it and the surrounding terrain have a look similar to mountains in Patagonia, or Canada’s Baffin Island.

Mount Bonneville and Raid Peak seen from Scab Creek Trail Central Wind River Range  #69072  Purchase

Backpacking into the Central Wind River Range

The Middle Fork Lake Valley is about 20 miles from the nearest trailhead at Scab Creek. This, together with the variety of photographic subject matter, necessitated a longer multi-day trip. To allow enough time at key locations, I had a budget of 9 nine days. This would give enough flexibility to stay longer in promising spots.

Stormy Sunset Wind River Range  #69049  Purchase

Arriving at the Scab Creek Trailhead, the afternoon before starting, I sorted through and packed all my gear. Towards evening, some brief showers passed through, making me think there may be some great evening light in the making. So I drove a short way back down the road to a viewpoint to scout a good spot. It didn’t take long to see my instincts were right. Several storm cells were in the area with plenty of room in between them for the setting sun to break through. The resulting light show kept me on my toes for quite some time.

The next morning, my trip began early with the destination for the day, 10 miles away at Dream Lake. Accessing the high peaks along the Continental Divide in Central Wind generally requires a long approach. A high-rolling landscape with numerous lakes characterizes this area, and it’s usually on the second day before the high peaks are reached. So the first day was a long, uneventful march with a cool dip in Dream Lake awaiting at the end.

Nylon Peak and Pronghorn Peak reflected in pond near Lee Lake Nylon and Pronghorn Peaks Wind River Range  #69083  Purchase

Middle Fork Lake/ Lee Lake Central Wind River Range

On day two, the trail begins to approach the real mountains. After a gradual climb and skirting a few more lakes, the trail ends at a small pass overlooking the Middle Fork Valley. This is where I finally had my first tantalizing view of Lee Lake and the surrounding granite spires. From here on, it was all trail-less cross-country travel over wide-open terrain. This is the kind of travel most backpackers dream of.

After making my way down from the pass, I began to look for a good campsite close to good photo compositions. Just short of Lee Lake were some small photogenic ponds, with a decent campsite close by. With these in the foreground, the imposing summits of Nylon Peak, Pronghorn Peak, and Dragon’s Head made for a dramatic scene. All I needed was some good light.

Pronghorn and Dragon Head Peaks reflected in pond near Lee Lake, Bridger Wilderness. Wind River Range, WyomingPronghorn and Dragon Head Peaks Central Wind River Range  #691371  Purchase

The Winds are notorious for afternoon thunderstorms followed by evening clearing, which I experienced firsthand. There were rain showers that afternoon and several hours of constant hail and thunder the next day. During the three days I spent at that camp, there were a few instances of decent light, but not as dramatic as I was hoping for.

Pronghorn Peak and Lake Donna. Bridger Wilderness, Wind River Range WyomingPronghorn Peak and Lake Donna #69194  Purchase

Pronghorn Peak Central Wind River Range

Moving up to a higher camp directly across from Pronghorn entailed some tiring bushwhacking through thick brush. From a campsite at 11,000′ directly below Nylon Peak, I was able to spend a day exploring and scouting out photo compositions. From one pass, I was able to gaze out to Bonneville Peak and down into Bonneville Lakes, which was one of my destinations from the previous summer.

Lake Donna Bridger Wilderness, Wind River Range WyomingLake Donna Wind River Range  #69193  Purchase

Following a moraine down from the pass to Lake Donna, I found the compositions I was looking for. The dramatic vertical split spires of Pronghorn Peak began right at the shore of the lake. A large boulder field at the outlet framed the scene perfectly. Again, good light would be the key to great photos. And since you never know if you’ll get another chance, I made several photos on the spot.

My plan was to return before dawn the next morning, but the sky was empty of the dawn clouds I was hoping for. Although I was ready and waiting, the light never came. Nylon Peak cast a predictable, harsh shadow across Pronghorn instead. All I could do was watch that shadow slowly move down as the sun rose higher against an empty blue sky.

Pronghorn Peak and Lake Donna. Bridger Wilderness, Wind River Range WyomingPronghorn Peak and Lake Donna #69198  Purchase

My few photos from the evening before were the best opportunities for that particular composition. It was disappointing, but thinking positively, there was another future excuse to return to this stunning location.

Nylon Peak Noel Lake. Bridger Wilderness, Wind River Range WyomingNylon Peak Wind River Range  #69254  Purchase

Noel Lake and the Continental Divide

By now, I’ve already been in the area for four days with only one more day left before needing to head out. The last destination to visit was Noel Lake, a lonely body of water sitting right on the Continental Divide below the eastern face of Nylon Peak.

If you are in the area or passing through on the Wind River High Route, it would be a shame to not check it out. For me, it was a short hike, only about one mile further and 500′ higher. Despite the close proximity, it was slow going. Most of the route is across a seemingly endless boulder field. Once at the lake, which is 11’500′ up on the Divide, the goal is to find a campsite. The entire vicinity around the lake is more boulders. The few places big enough for a tent are on an inconvenient slope. However, a bit of scouting came up with possibly the only suitable open and level spot.

Nylon Peak Noel Lake. Bridger Wilderness, Wind River Range WyomingNylon Peak and Noel Lake Wind River Range  #69254  Purchase

Several yards from camp is the actual Divide, with a tiny pass bearing the name Col De St. Michaels. The view southeast to Lander Peak and its glaciers is spectacular, as is the view northeast to Roberts Mountain and Moraine Lake far below. Rock cliffs and water in every direction.

At Noel Lake, I was facing the usual prospect of having some great photos lined up, only to wait and hope for good light. Unfortunately, except for some mid-day clouds, my envisioned photos of Noel Lake and Nylon Peak didn’t appear. However, there was some very nice light at sunset, looking down and over the Middle Fork Valley.

Sunset over Middle Fork Basin seen from Noel Lake on the continental Divide. Bridger Wilderness, Wind River Range WyomingSunset from Noel Lake Wind River Range #69259  Purchase

Hiking out of the Central Wind River Range

From the Middle Fork Valley, there are some outstanding alternative return routes. Some of them involve negotiating passes in other valleys, while others take little-used trails across the benchland. I chose to return on the same trails I came in on, with one last camp again at Dream Lake.

Aside from the first few miles on the first day, I came across very few other parties. So if you’re looking for backcountry solitude, this is a good place to find it. I came across quite a few parties starting out in the last five miles; about half of them were horse-packing. The easy way to explore the Winds.

I should also mention that of all the people I encountered, I was probably the only one without a fishing pole. Most of those 1300 lakes have fish in them, and many rarely see a line dropped in. I’m not a fisherman, but I can imagine there are some trophy fish out there just waiting to give an angler a thrill.

Boulder River Bridger Wilderness Wind River Range Wyoming Central Wind River RangeBoulder River Central Wind River Range #69349  Purchase

If You Go to Middle Fork and Lee Lake

Distance from Scab Creek Trailhead to Lee Lake:  15 miles
Elevation:  ~3200 gain from the trailhead to Lee Lake
Add another 1000′ and 3 miles for Lake Donna and Noel Lake
Difficulty:  Moderate-Difficult
Red Tape:  As of 2020, no permits are needed

Totals for my nine-day trip including side trips and photo scouting
Distance: ~38 miles
Elevation: ~4200″ not including numerous elevation gains and losses

The Scab Creek Trailhead is located 28 miles south of Pinedale. The last six miles are on a good gravel road. Adjacent to the trailhead, there is a small campground. Like most trailheads in the Winds, parking can be at a premium; get an early start.

Make sure you take along plenty of insect repellent. The Winds are notorious for their ravenous hordes of mosquitoes and flies. Although they weren’t too bad during my trip in early August. Also, be prepared for dramatic weather changes. Summer thunder and lightning storms are very common along the Continental Divide. Because of this, stay off high ridges and summits during this time of day.

The town of Pinedale makes a great base for multiple trips into the Winds. It has everything you’ll need, from good food and lodging to one of my favorite outdoor recreation stores, the Great Outdoor Shop. It’s stocked with everything needed for a successful trip, including a very knowledgeable and friendly staff. Don’t visit Pinedale without dropping in! Right next door to the great Outdoor Shop is the best place to go for a post-trip meal, the Wind River Brewing Company. They have excellent burgers and great brews!

Stormy sunset from Scab Creek Trailhead. Bridger-Teton National Forest Sublette County, WyomingStormy Sunset Wind River Range  #69042  Purchase

Leave No Trace

Please Please Please!  Don’t plan a trip to this or any other wilderness area unless you are prepared to strictly follow the guidelines of Leave No Trace (LNT). The Wind River Range and all other wilderness areas throughout the world are under incredible pressure from growing numbers of visitors. Please do your part to help preserve these precious areas for future generations!

To learn more about the principles and practicing LNT please take a few minutes to visit the Leave No Trace Center for Outdoor Ethics. Your children and grandchildren will thank you!

Seven Leave No Trace Principles

  • Plan ahead and prepare.                                       
  • Travel and camp on durable surfaces.                 
  • Dispose of waste properly.                                                                         
  • Leave what you find.                                            
  • Minimize campfire impacts (be careful with fire).
  • Respect wildlife.  
  • Be considerate of other visitors.

Photo Gear Used On This Trip

Nikon D850
Nikkor Lens:
14-24mm 2.8G ED
24-70mm 2.8E ED
70-200mm 2.8E FL ED
Gitzo 1532 Tripod
Really Right Stuff B-55 Ball Head
Assorted Lee Graduated Neutral Density Filters
B+H Polarizing Filter
Vello FWM-N2 Remote Shutter Release

Backcountry camp below Pronghorn Peak. Bridger Wilderness. Wind River Range, Wyoming Central Wind River RangePronghorn Peak Camp Wind River Range  #69170  Purchase

If you enjoyed reading Central Wind River Range Backpacking, please share it with your friends and family.

And check out these other Wind River posts!
Cirque of the Towers Wind River Range
Bonneville Lakes Wind River Range
Island Lake Wind River Range
Titcomb Basin Wind River Range
Indian Basin Wind River Range
Green River Lakes Wind River Range
Pyramid and Shadow Lakes Wind River Range

All photos appearing in Central Wind River Range Backpacking are available for Commercial Licensing and Fine Art Prints. Click on any image to purchase, or contact me for more info!

Central Wind River Range Backpacking

Big Boulder Lakes Basin, White Clouds Wilderness Idaho

White Clouds Wilderness Idaho

White Clouds Wilderness Idaho

Big Boulder Lakes Basin, White Clouds Wilderness IdahoBig Boulder Lakes White Clouds Wilderness #68936  Purchase

In central Idaho there lies a wilderness area that is seemingly hidden in plain sight. Established by Congress in 2015 the Cecil D. Andrus-White Clouds Wilderness is one of the youngest in the nation. The reason I say that it is hiding in plain sight is the fact the nearby Sawtooth Wilderness grabs all the attention. Visitors flock to the Sawtooths to hike, climb, and fish among their jagged spires. And for good reason, the Sawtooths are visually akin to the Grand Teton Range, albeit on a smaller scale.

But most visitors are unaware of the quiet yet spectacular wilderness just a stone’s throw away. To the east across the valley cut by the Salmon River are the White Clouds. If you climb high in the Sawtooths and look east you’ll get a distant glimpse of them. A small range of high peaks consisting of light-colored rock looking like clouds on the horizon.

There are 63 named lakes in the range and several peaks over 11,000′ in elevation. Additionally, bordering the Cecil D. Andrus-White Clouds Wilderness is the Hemingway-Boulder Wilderness, and the Jim McClure-Jerry Peak Wilderness areas. But for our purposes, we’ll concentrate on the White Clouds.

Trail sign, White Cloud Wilderness IdahoBig Boulder Lakes Trail Sign  #68891 

Backpacking to Walker Lake

Last summer I made my first trip to the White Clouds. The core area of the range most popular with hikers has two sections. In the south is the Boulder Chain Lakes area, which sees more visitors. In the north is the Big Boulder Lakes Basin, my destination for this trip. Both areas can be combined into one long multi-day trip. However, there are a few difficult cross-country sections with steep climbs, exposure, and difficult route finding. This makes a loop route more than the average backpacker is willing to attempt.

One reason Big Boulder Basin sees fewer visitors is the access to the trailhead at the Livingston Mill. From Stanley, this entails a long drive along the Salmon River and then up a narrow and dusty gravel road. There is at least one nice perk to accessing the White Clouds from here, read on to the end to find out what it is.

White Clouds Wilderness IdahoWhite Clouds Wilderness #68980

The last mile or two is pretty narrow with a steep drop-off. Keep a sharp eye out for oncoming vehicles since backing up to the nearest pullout would not be pleasant. There is a large parking area at the road end near Livingston Mill, elevation 7200′.

My destination on the first day was Walker Lake. It’s about 7 miles with 2200′ of elevation gain on a good trail. After the first two multi-use miles the trail splits, the left continues to Boulder Chain Lakes and the right climbs to Walker and Big Boulder Lakes. It is possible to continue in one day to the scenic subalpine basin above Walker Lake, however, the remaining two miles is just a faint route over and through swamps and boulders. Walker Lake was good enough for me, even though it had limited views and camping spots.

Sheep Lake Cecil D. Andrus-White Clouds Wilderness IdahoSheep Lake #68893

Wrong turn to Sheep Lake

The next day I started up to what I thought would be my destination at Sapphire Lake. At first, there was no trail to follow over the rocky terrain. I finally picked up a faint trail, but unknowingly the very steep path was leading me to Sheep Lake in the adjacent basin.  After finally arriving at walled in Sheep Lake it was apparent I made a route-finding mistake. But that was ok since it was a picturesque location with a decent campsite, and I had plenty of time.

Later a short scramble brought me to a ridge top with a commanding view of the surrounding peaks and Walker Lake far below. I was also able to discern from this view the correct route to Sapphire Lake and where I went wrong earlier in the day. From Sheep Lake there was a cross country route around the lake, over an easy pass, and down to Sapphire and the other upper basin lakes. But although I was carrying a good map that route wasn’t obvious from my camp.

White Clouds Wilderness IdahoView of Walker Lake  #68901  Purchase

The next day I retraced my steps down the same path to where I made my mistake. Since the correct route split off in a swampy meadow it was certainly easy to get off track. I finally came across a faint path leading in the right direction, but quickly lost it again. By this time my thought was to just plow straight up, with the assumption I would inevitably get to the top or intersect with the trail again. I did come across the trail again, by now a well-worn path, just two short switchbacks from the top.

Sapphire Lake White Clouds Wilderness IdahoBig Boulder Lakes #68917  Purchase

Sapphire Lake and the Upper Basin

Finally, in the right basin, all traces of paths vanished. However, by now I was in the subalpine and the terrain was open with easy route finding. After a leisurely walk over granite slabs and past several lakes, Sapphire Lake finally spread in front of me. Locating a prime spot with a view I set up camp and took it all in.

There are six lakes in the basin and multiple ponds and tarns, all with their own special character. Cirque, Sapphire, and Cove Lake are the biggest, and in my opinion, Sapphire is the most scenic. Of course, since I was here for photography so scouting out all of them was essential.

David O. Lee Peak, Cecil D. Andrus-White Clouds Wilderness IdahoDavid o’ Lee Peak White Clouds Wilderness  #68945  Purchase

After Sapphire, Cirque Lake appeared to offer great photographic potential. At about 10,500′ Cirque Lake was a gem sitting at the feet of 11,342′ David O. Lee Peak. In contrast to the surrounding granite, David O. Lee is composed of limestone, the rock that gives the White Clouds their name.

Indeed, although Cirque Lake was a grand scene it was set in a stark rocky alpine basin. Only on one section of the shoreline, there were some nice mosses and carpets of wildflowers. The landscape did have photographic potential, but only in the right light. There are a couple of great other options for exploring Cirque Lake.

O'Calkens Peak Slide Lake, Cecil D. Andrus-White Clouds Wilderness IdahoNeck Lake O’Caulkens Peak #68904 

One would be to hike up the easy moraine on the southeast side of the lake. At the top, you’ll be in a truly alpine environment of rock and snow. Tucked away below the wall of the cirque are The Kettles, a small group of tarns, and classic examples of past glacial activity. Along the way up the moraine, you’ll also get great views down to the basin and other lakes.

Another option would be to ascend the slope on the north side of the lake to a small pass. From the pass, you could look across to O’Caulkens peak at 11,487′ and down to Neck Lake in the upper valley I accidentally ended up on the second day. Or you could keep going higher to another pass looking down the west side of the White Clouds. For the truly ambitious a climb to the summit of David O. Lee Peak is possible.

Big Boulder Lakes Basin, White Clouds Wilderness IdahoBig Boulder Lakes #68955 Purchase

A White Clouds Wilderness Post Trip Treat

After exploring and photographing Big Boulder Lakes Basin it was time to head out. Indications of changing weather and approaching storms put an end to my first visit to the White Clouds Wilderness. I was toying with the idea of moving south to check out Boulder Chain Lakes Basin, but the change in weather ruled it out. Hopefully next summer I’ll be able to return and explore and photograph that section.

I should note here since my main goal on backpacking trips is photography my trips are a bit different than that of other backpackers. Others may enjoy covering many miles, being on the move from sun up to sundown. On the other hand, I usually have a goal of allotting a generous amount of time in one area for photography. So in this instance moving to the Boulder Chain Lakes would allow only one brief day for photography. From all indications at least two to four days would be needed.

West Pass hot springs, East Fork Salmon River IdahoWest Pass Hot Springs  #68887

One of the great perks of hiking in central Idaho is the abundance of natural hot springs. There is a huge variety available for the avid soaker, from roadside pools to remote backcountry springs. In this instance, my trusty guidebook, Hot Springs in the Pacific Northwest, pointed to West Pass Hot Springs, not far away on the same access road.

West Pass hot springs, East Fork Salmon River IdahoWest Pass Hot Springs  #68886 

West Pass is about as remote as you can get by vehicle, about 25 miles down a forest service road. The springs flow from a hillside just above the East Fork Salmon River. Hot water is diverted into three strategically placed bathtubs. You can also try soaking in a few riverside pools. At any rate, having a good hot soak at the end of a multi-day backpack is a treat that can’t be passed up!

Cirque Lake, David O. Lee Peak, Cecil D. Andrus-White Clouds Wilderness IdahoDavid o’ Lee Peak White Clouds Wilderness  #68929   Purchase

If You Visit Big Boulder Lakes, White Clouds Wilderness

Distance from trailhead to Sapphire Lake:  about 9 miles
Elevation Gain:  about 3600′
Difficulty:  Moderate-Difficult
Red Tape:  No permits are needed

The Livingston Mill Trailhead is located about 58 miles from Stanley Idaho. Take U.S. 75 37 miles northeast from Stanley to East Fork Road. Go another 17 miles to Big Boulder Creek Road, and finally another 4.3 miles to Livingston Mill. West Pass Hot Springs is another 18 miles further on East Fork Road. Check out Hot Springs in the Pacific Northwest for a detailed description.

The small scenic town of Stanley Idaho makes a great base for trips into the Sawtooths. Lodging, groceries, restaurants, outdoor gear stores, and a great bakery are in town. There are also many campgrounds in the vicinity.

David O. Lee Peak, Cecil D. Andrus-White Clouds Wilderness IdahoDavid o’ Lee Peak White Clouds Wilderness  #68943  Purchase

Leave No Trace

And now for a short lecture. As I’ve been saying in previous posts, don’t even think about visiting this or any other wilderness area unless you are prepared to strictly follow the guidelines of Leave No Trace (LNT). The Wind River Range and all other wilderness areas throughout the world are under incredible pressure from growing amounts of visitors. Please do your part to help preserve these precious areas for future generations!

To learn more about the principles and practicing LNT please take a few minutes to visit the Leave No Trace Center for Outdoor Ethics. Your children and grandchildren will thank you!

Seven Leave No Trace Principles

  • Plan ahead and prepare.                                       
  • Travel and camp on durable surfaces.                 
  • Dispose of waste properly.                                                                         
  • Leave what you find.                                            
  • Minimize campfire impacts (be careful with fire).
  • Respect wildlife.  
  • Be considerate of other visitors.

Photo Gear Used On This Trip

Nikon D850
Nikkor Lens:
14-24mm 2.8G ED
24-70mm 2.8E ED
70-200mm 2.8E FL ED
Gitzo 1532 Tripod
Really Right Stuff B-55 Ball Head
Assorted Lee Graduated Neutral Density Filters
B+H Polarizing Filter
Vello FWM-N2 Remote Shutter Release

If you enjoyed reading White Clouds Wilderness please share it with your friends and family. And make sure you check out my previous post on the Eagle Cap Wilderness Oregon

Some photos appearing in White Clouds Wilderness Idaho are available for Commercial Licensing and Fine Art Prints. Click on the image to purchase, or contact me for more info!


Eagle Cap and Mirror Lake Eagle Cap Wilderness Orergon

Eagle Cap Wilderness Wallowa Mountains

Eagle Cap Wilderness Wallowa Mountains

Eagle Cap and Mirror Lake Eagle Cap Wilderness OregonEagle Cap reflected in Mirror Lake  #68776  Purchase

As part of the Summer 2020 Photography Tour, my first destination was the Eagle Cap Wilderness in northeast Oregon. Over the years I’ve repeatedly passed over this rugged wilderness while on my way to other destinations further east. Every time I would drive by on Interstate 80 I’d glance at them and promise to visit them next time. This went on for over twenty years! However, on this trip the stars aligned and I finally worked it into the schedule.

The Eagle Cap Wilderness sprawls out over most of the Wallowa Mountains. At over 360,000 acres it is the largest wilderness area in Oregon. That’s quite a lot of territory for such a small mountain range. A couple of other things also sets the Eagle Cap apart from other Oregon wilderness areas. First is its geology. Nearly every other mountain wilderness in Oregon is made up of various forms of volcanic rock. In contrast, the Wallowas contain mostly granitic rock. Secondly, the Wallowas are in a higher range. Many of the peaks are  1000′ – 2000′ higher than those in the Cascade Range to the west. And of course, due to its eastern location, the climate is drier, although the peaks still receive copious amounts of winter snow.

Eagle Cap, Eagle Cap Wilderness OregonEagle Cap #68862  Purchase

Backpacking In The Eagle Cap Wilderness

Since this was my first trip, and I wasn’t sure how long it would be before a return visit, I wanted to photograph in the most scenic locations. After poring over maps, online trip reports, and searching for photos of specific areas I settled on two destinations.

For nearly everyone, the central Lakes Basin is the prime spot for day hikes and overnight trips. This area is where the highest peaks and most of the alpine lakes are situated. Consequently, it is also the area that receives the most visitors. I chose two areas for this trip, and due to practicalities divided them into separate trips. The first would be an extended stay at Mirror Lake and several adjacent lakes, by way of taking the East Lostine River Trail. The second trip was to be a shorter one to Ice Lake via the West Fork Wallowa River Trail. Both trips would ensure excellent photo opportunities. The one uncertainty was the fact that despite it being nearly mid-July there still appeared to be a good deal of snowpack left in the alpine.

Lostine River Trail, Eagle Cap Wilderness, Wallowa Mountains OregonEast Lostine River Trail  #68765  Purchase

Hiking Into Mirror Lake

This trip was also to be my introduction to the realities of traveling during the COVID 10 Pandemic. Driving up the long, bumpy, and dusty Lostine River Road, where I was to spend the first-night car camping,  I found nearly every campsite was occupied. At the time I thought it was due to being the weekend. Later on, I would find out that where or when didn’t matter, crowds were everywhere. After finding a decent spot I sorted through and prepared all my gear for an early start in the morning.

The next day I hit the trail bright and early and brimming with excitement about the views and pictures awaiting me. The first half of the East Lostine River Trail is fairly uneventful and typical of a forest approach hike. The second half, however, is very pleasant and scenic. This is due to the fact it enters a very long nearly flat sub-alpine valley with wide-open views for over a mile. During this section the trail skirts along open meadows, ponds, and the lazily flowing Lostine River. At the head of the valley looms 9572′ Eagle Cap Peak. This is where I first worried about the timing and feasibility of my two trips.

Eagle Cap Wilderness OregonEagle Cap Wilderness Cairn  #68822  Purchase

There were still numerous spots of avalanche snow left melting on the trail, and Eagle Cap, and the pass to Mirror Lake was nearly covered in snow. This left me thinking about the chances of successful photography, and of being able to visit all the lakes on my itinerary. The last mile or so to the pass was mostly over deep snow, although it was firm and post-holing was at a minimum. It was a pleasant surprise to find more open ground at the pass. Conditions at Mirror Lake were my main concern though.

Backcountry camp Eagle Cap Wilderness OregonMirror Lake Camp Eagle Cap Wilderness  #68804  Purchase

Mirror Lake Camping And Photography

On approaching Mirror Lake at 7595′ I saw that its surfaces had about 75% ice on. Most of the open water was along the shoreline, which was good news for me. Also, the majority of designated campsites were still under snow. However, one especially attractive site near the lake was completely snow-free.

There probably wasn’t a better spot in miles. The view across the lake to Eagle Cap was outstanding, and if the light cooperated I was sure to come away with some great photos. As usual, I spent the rest of the afternoon scouting the area in advance for photo compositions. And while I found a few good ones the one near my camp was clearly the best, at least until all the snow melted.

Eagle Cap and Mirror Lake Eagle Cap Wilderness OregonAlpenglow over Eagle Cap  #68793  Purchase

Up until that time I planned to move on the next day over another pass to Glacier Lake. But it was obvious the way would be entirely over snow, and since Glacier Lake was even higher up it was certain to be nearly frozen over. Because of this I reluctantly made the decision not to go, and spend more time in the immediate area instead.

During the afternoon the sky had clouded over,  and I thought I would be out of luck for a photo session with good evening light. But towards sunset, it became apparent that the clouds were starting to clear in the west. Soon sun rays began to stream through and illuminate the lake area and Eagle Cap.

Backcountry camp Eagle Cap Wilderness OregonMoccasin Lake Camp  #68814  Purchase

Moccasin Lake And Out

Since Glacier Lake was now out of the picture I went scouting higher up on the open slopes behind the camp and on the way to the other lakes in the basin. There was still too much snow to make the other lakes worthwhile so I went down to nearby Moccasin Lake. Even though it was only a few hundred feet lower there was considerably less snow. But unfortunately, I found only one established campsite. It was on a rock shelf above the lake with a great view, but it was also sorely overused. This must be the only site in the area since there was enough bare dusty ground for several parties.

I wasn’t as fortunate here with the light and compositions so I took advantage of clear skies to do some night sky Milky Way photography. The next day I decided to move back down the trail to the open meadows along the Lostine River. On my way in I saw some great photo opportunities in this area so I made this my final destination on this hike. After finding a hidden out-of-the-way campsite I was able to make several more evening photos.

Milky Way over Eagle Cap Wilderness OregonMilky Way Over Eagle Cap  #68819   Purchase

The next day I headed out with mixed feelings. On the one hand, I was able to spend some time in one of the best locations in the Wallowas and make some wonderful images to boot. On the other hand, the lingering snowpack prevented me from photographing some other great areas.

Afterward, I drove to Joseph Oregon to have a good meal. I also had to decide if it would be worth doing the second trip to Ice Lake. After agonizing over the decision it was apparent that it was still too early in the season to make it worthwhile for the photographs I had in mind.

So the next morning I began the drive to the second major destination of the summer photo tour, the Cecil D. Andus-White Clouds Wilderness of Idaho. Check back to read a post on that incredible area!

Eagle Cap, Eagle Cap Wilderness OregonEagle Cap Reflection  #68866 Purchase

If You Go:

Round trip to Mirror Lake from Lostine River Two Pan Trailhead:  14 miles
Elevation Gain:  about 2200′
Difficulty:  Moderate
Red Tape:  Northwest Forest Pass or America the Beautiful Pass required
Map: Green Trails Wallowa Mountains Eagle Cap Wilderness Map

The Two Pan Lostine River Trailhead is located about 18 miles south of Lostine Oregon, on Forest Road #8210. The last 10 miles are unpaved and can be rough in several places. Along Forest Road #8210 there are numerous small campgrounds and a few opportunities for primitive dispersed camping.

Note that Mirror Lake is only one of many backcountry destinations from this trailhead. Mirror Lake can be the only destination or be part of extended backpacking trips into the Wallowas. Check out the map in the link above for all the exciting possibilities.

The town of Joseph Oregon at the head of the very scenic Wallowa Valley makes a great base for trips into the Wallowas. It’s also a great jumping-off town for adventures in the Hells Canyon Recreation Area. It has everything you’ll need, from good food and lodging to brewpubs, a distillery, and outdoor recreation stores. There are also numerous local artists displaying their work in Joseph’s galleries. Make sure to check out the Josephy Center For Arts & Culture while you’re there.

Eagle Cap reflected in Mirror LakeEagle Cap Mirror Lake  #68801  Purchase

Leave No Trace

And now for a short lecture. As I’ve been saying in previous posts, don’t even think about visiting this or any other wilderness area unless you are prepared to follow the guidelines of Leave No Trace (LNT). The Eagle Cap and all other wilderness areas throughout the world are under incredible pressure from growing amounts of visitors. Please do your part to tread lightly and help preserve these precious areas for future generations!

To learn more about the principles and practicing LNT please take a few minutes to visit the Leave No Trace Center for Outdoor Ethics. Your children and grandchildren will thank you!

Seven Leave No Trace Principles

  • Plan ahead and prepare.                                       
  • Travel and camp on durable surfaces.                 
  • Dispose of waste properly.                                                                         
  • Leave what you find.                                            
  • Minimize campfire impacts (be careful with fire).
  • Respect wildlife.  
  • Be considerate of other visitors.

Photo Gear Used On This Trip

Nikon D850
Nikkor Lens:
14-24mm 2.8G ED
24-70mm 2.8E ED
70-200mm 2.8E FL ED
Gitzo 1532 Tripod
Really Right Stuff B-55 Ball Head
Assorted Lee Graduated Neutral Density Filters
B+H Polarizing Filter
Vello FWM-N2 Remote Shutter Release

If you enjoyed reading Eagle Cap Wilderness Wallowa Mountains please share it with your friends and family.

All photos appearing in Eagle Cap Wilderness Wallowa Mountains are available for Commercial Licensing and Fine Art Prints. Click on any image to purchase, or contact me for more info!

Wind River Range Sunset, Wyoming

Summer Photo Tour 2020 Update

Summer Photo Tour 2020 Update

Lake McDonald Glacier National ParkLake McDonald Glacier National Park #69745  Purchase

Final On The Road Update 8/19/2020:

This brief addition will be my final on the road update of the summer photo tour. I’m still in Glacier National Park and since my last post I’ve witnessed a sunrise marriage proposal on Lake McDonald, completed a 40 mile 6 day backpacking photo shoot, and seen seven grizzly bears in the backcountry, on one occasion only about 25′ away from me. So yes, it’s been a busy adventurous visit!

By this time next week I should be back home in the office. For many weeks to come I’ll be there catching up on business and processing all the new images. During that time I’ll be posting groups of new images to the website and updates on the blog. 

Original Post:

Wind River Range Sunset, WyomingWyoming Sunset #69046  Purchase

Sitting right now just outside of Glacier National Park it seems time to post another Summer Photo Tour 2020 Update. Since my last post I’ve visited and photographed lots of new and old locations. And once again although Grand Teton and Yellowstone weren’t on my list, necessity had me briefly drive through both parks. And once again I’m glad I did, because I added several wonderful new images to my files from them!

Grand Teton National ParkGrand Teton National Park #69391  Purchase

Sunrise at Mud Volcano geothermal area, Yellowstone National ParkYellowstone National Park #69428  Purchase

Since my last post I’ve added lots of exciting new images from the following locations:

  • Bridger Wilderness, Wind River Range Wyoming, Middle Fork/Lee Lake vicinity
  • Grand Teton National Park
  • Yellowstone National Park
  • Beartooth Pass/Highway Wyoming
  • Upper Missouri River Breaks Montana
  • Glacier National Park: Comeau Pass/Sperry Chalet; Lake McDonald, Kintla Lake/Boulder Pass/Hole In The Wall

Lee Lake, Bridger Wilderness, Wind River Range WyomingLee Lake Wind River Range Wyoming #69085  Purchase

Pronghorn Peak Lake Donna, Bridger Wilderness, Wind River Range WyomingPronghorn Peak Wind River Range Wyoming #69202  Purchase

There was one major change to the Summer Photo Tour 2020 itinerary. This was a decision to take a pass on the Chinese Wall in the Bob Marshall Wilderness of Montana. Instead I’m opting to spend the remainder of the trip backpacking in Glacier National Park. Although I’ve visited and photographed in Glacier many times over the years this will be my first major backpacking trip there since I was a teenager.

Beartooth Lake WyomingBeartooth Lake Wyoming #69516  Purchase

Beartooth Mountains seen from Beartooth Pass, WyomingBeartooth Mountains Wyoming #69614  Purchase

Appearing in this post are some of the photo highlights. These photos are quick on the road edit and processing with the final image to come later when I’m back in the office. Image licensing and fine art prints are available for all of them, but print orders may be delayed several weeks.

Missouri River Breaks near Judith Landing, MontanaUpper Missouri River Breaks Montana #69672  Purchase

Missouri River Breaks near Judith Landing, MontanaUpper Missouri River Breaks Montana #69684  Purchase

All photos appearing in Summer Photo Tour 2020 Update are available for Commercial Licensing and Fine Art Prints*.

*Print orders may be delayed several weeks until I return to the office.

Want to learn more about Landscape & Nature Photography? Take your Creative Photography to the next level with  Private Instruction and Guided Photo Tours.


Castle Reef Mountain Sun Canyon Montana

Photography Tour Summer 2020

Photography Tour Summer 2020

Castle Reef Mountain Sun Canyon Montana Photography Tour Summer 2020Castle Reef Mountain Montana #68136  Purchase

Photography Tour Summer 2020 begins on July 7! For obvious reasons it has been extremely difficult this year to plan photo shoots, and I’m incredibly excited to get back to work on the road and trail. Many locations I was hoping to photograph remain closed or have difficult travel restrictions in place. With this in mind, I decided to once again make this year’s photography tour based on wilderness backpacking. Not only is it a method of photography I thoroughly enjoy, but in the current climate, it is also safer.

As with the 2019 photography tour, this year will include some new destinations I haven’t yet photographed, along with old favorites where I need more in-depth coverage. In some ways, this trip will be a continuation of last year’s. Most locations will be in the Northern Rocky Mountains and will include some that I couldn’t get to last year.

Red Barn Wallowa Valley Oregon Photography Tour Summer 2020Wallowa Valley, Oregon #61145  Purchase

Eagle Cap Wilderness Oregon

The first stop will be the Eagle Cap Wilderness of Oregon’s Wallowa Mountains. This is a destination that has been on my see and photograph list for many years, but for various reasons, I’ve passed them up. On this trip, I hope to photograph many of the alpine lakes in the core loop of the range.

The Wallowas, located in the northeast corner of the state, is a unique range in Oregon. While most mountains in Oregon are made of volcanic rocks the Wallowas are mainly granitic and have a more rugged appearance. The Eagle Cap Wilderness is the largest in Oregon and is host to many alpine lakes and some of the highest peaks in the state.

Little Redfish Lake Sawtooth Mountains Idaho Photography Tour Summer 2020Little Redfish Lake, Sawtooth Mountains Idaho #66235  Purchase

White Cloud Wilderness Idaho

Last year while backpacking and photographing in the Sawtooth Mountains of Idaho I saw another range of high mountains to the East. After some research, I found out that they were peaks of the White Cloud Wilderness, part of the newly created Boulder-White Cloud Wilderness. With the other units being the Jim McClure-Jerry Peak Wilderness, and the Hemingway-Boulders Wilderness. Together they protect 275,000 acres of spectacular mountain wilderness in Central Idaho.

Rising just across the valley from the more famous and popular Sawtooth Mountains, the White Clouds also have many peaks over 10,000′ with numerous alpine lakes. However, since it is less well-known I’m expecting a greater degree of solitude. On this initial visit, I hope to visit and photograph many of the peaks and lakes in the core area.

Mount Bonneville Wind River Range WyomingBonneville Lake Wind River Range #66285  Purchase

Wind River Range Wyoming

Last year I spent considerable time photographing in the “Winds”.  However, it is a big range with enough destinations to fill a lifetime of exploration. This year I plan to visit a few new spots and return to a couple of classics. One possible backpack is Desolation Valley/Hailey Pass-Washakie Pass Loop. Another is Middle Fork Lake and Pronghorn Peak in the central part of the range. Finally, a return trip to Cirque of the Towers and Deep Lake is also on the table.

Castle Reef Mountain Sun Canyon MontanaRocky Mountain Front Range Montana #68145  Purchase

Bob Marshall Wilderness Montana

Affectionately known among locals and avid backpackers as “The Bob”, this is another wilderness destination that has been on my must-see list for decades. The Bob Marshall Wilderness Complex is a huge swath of land straddling both sides of the Continental Divide. An important part of the Greater Yellowstone Ecosystem it is home to the largest intact population of Grizzlies in the lower 48.

The Bob was one of the first areas I wanted to see when I started backpacking in my late teens. Unfortunately, it was passed over and forgotten many times over the years in favor of other destinations. This year I hope to remedy that oversight. The sole destination on this trip will be a multi-day backpack to the famous Chinese Wall and the meadows along its base. This is arguably the signature feature of the complex, a 12-mile-long 1000′ high limestone escarpment on the Continental Divide.

Bighorn Canyon National Monument MontanaBighorn Canyon Montana #52263  Purchase

Other Montana Destinations

Last year, due to limited time and weather, I had to skip a few destinations in Montana. Hopefully this year I’ll get to photograph them. While this writing is not certain, Bighorn Canyon National Recreation Area, Beartooth Highway, and the Upper Missouri River Breaks are back on the list. Then of course there are also several backcountry destinations in Glacier National Park I’d like to photograph, but that’s probably going to be a stretch.

Backpacker on Titcomb Basin Trail Wind River Range WyomingWind River Range Backpacking #66780  Purchase

List of Locations:

Below is the list of the Summer 2020 Photography Tour locations in the order of start to finish. I would love to hit all of them but of course, time and weather will dictate my itinerary. If you’re planning on traveling to any of them let me know. I’d love to meet up if possible!

Eagle Cap Wilderness, Oregon
White Cloud Wilderness, Idaho
Wind River Range, Wyoming
Beartooth Highway, Wyoming/Montana
Bighorn Canyon National Recreation Area, Montana
Upper Missouri River Breaks, Montana
Bob Marshall Wilderness, Montana
Glacier National Park, Montana
*Locations subject to change due to weather and travel restrictions

All photos appearing in Photography Tour Summer 2020 are available for Commercial Licensing and Fine Art Prints

Want to learn more about Landscape & Nature Photography? Take your Creative Photography to the next level with  Private Instruction and Guided Photo Tours.

Photography Tour Summer 2020